
OpenMediaVault (OMV) is an open-source alternative for Windows Home Server (WHS). You can use it for setting up a NAS solution on your Raspberry Pi using nothing but the operating system itself.
This guide will help you get started with OpenMediaVault on your Raspberry Pi. But what is the OpenMediaVault and how does it work?
Before we dive into how to set up OpenMediaVault on the Raspberry Pi, let’s take a quick look at OpenMediaVault.
What is OpenMediaVault?
OpenMediaVault is an open-source home network server that runs from within Ubuntu (the open-source operating system for Linux), so it requires no setup or installation of any kind.
It provides all the functionality you’d expect from a home server, including media streaming, file access, backup, etc.
Inputs It also includes a web interface that allows you to remotely manage and configure the device. The project was initially developed by the French company Openelec but has since been taken under the wing of the German company XBMPedia.
The main difference between OpenMediaVault and other home servers such FreeNAS, Plex Media Servers, etc. is that OMV was designed to run entirely off-the-shelf components.

While many home servers use proprietary hardware such as WDTV Live Hubs, DTVs, NAS devices, and so on, OMV is built using regular PC hardware.
This means that there is no need to buy expensive hardware to create a personal server. You just need a spare computer running Ubuntu 16.04 LTS-or newer- and a USB hard drive to install Ubuntu 16.04 LST.
Why Set Up OpenMediaVault on a Raspberry Pi?
There are several reasons you might want to set OpenMediaVault on a Raspberry Pi instead of on a conventional home server. If you already own a Raspberry Pi, then you don’t need any additional hardware.
Secondly, the Raspberry Pi is incredibly compact and small enough to fit into a cupboard or even underneath a desk. Another benefit is that the Raspberry Pi comes preinstalled with Raspbian, which makes things much easier in comparison to using a full operating system, like Debian or CentOS.
The Raspberry Pi is also very cheap compared to most home servers and is also extremely versatile and can do a lot more than just act as your home server.
For example, you can use the Raspberry Pi as an access point, router, firewall, VPN server, media center, digital signage device, etc.
Requirements for Setting up OpenMediaVault on Raspberry Pi
Before you start setting up OpenMediaVault, make sure you have the following:
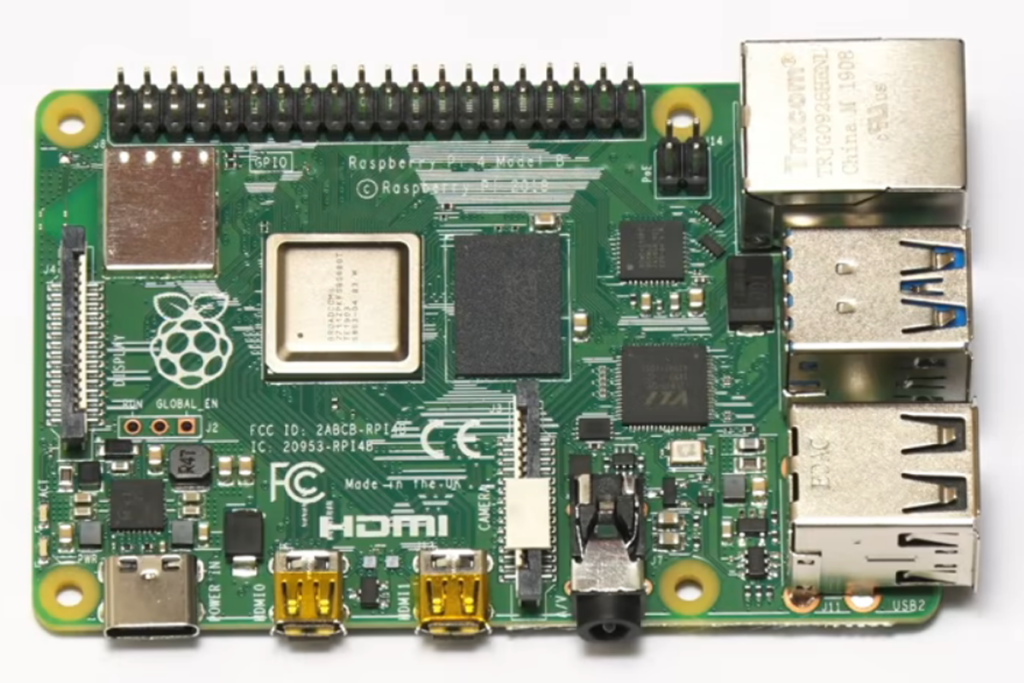
- Raspberry Pi Model B or newer
- A power supply capable enough to power the Raspberry Pi
- A micro SD adapter
- An SD card with 4GB of free space at least
- An HDMI cable
- A spare USB with a 2.0 port
- A keyboard and mouse
How to Install OpenMediaVault on the Raspberry Pi
Installing OMV onto the Raspberry Pi is easy, but there are some things to keep in mind. Thankfully, we are here to help you out! Follow this guide carefully and you will be well on the way to installing OMV with ease.
Make sure you’ve downloaded and installed the latest OMV onto your computer before you start. Once you’ve got the installer ready, start up your Raspberry Pi by plugging it into an HDMI port and connecting the HDMI cable to your monitor.
Step 1 – Download and Install OMV
First, download the newest version of OMV. Make sure you select “Download image” rather than “Download installer”. After downloading, unzip the archive and copy the contents of OMV folder onto your microSD card.
Next, insert the SD card into your Raspberry Pi and begin the process of booting it up. Press Enter to continue when the prompt pops up. You should see the OMV splash screen.
If you get a black screen, press Ctrl + Alt + F1 to switch to the virtual terminal. From there, type “sudo raspi-config” and make sure to carefully follow the instructions. You should then configure the Raspberry Pi to be able to perform some basic tasks.
After you’ve finished, reboot your Raspberry Pi using the command “sudo shutdown now”.
Step 2 – Configuring the Network Settings
Next, we are going to configure the network settings for the OMV on your Raspberry Pi. Connecting to the Internet requires plugging an Ethernet cable into one or both of the two available ports located on the back of your Raspberry Pi.
If you’re not sure how to identify these ports manually, refer to the manual provided in the OMV zip archive. You’ll be presented with a login screen where you can log in with any username/password combination you want.
Once you are logged in, click on the network icon in the upper right-hand corner of the desktop. To set up a new wireless network, select “Configure Wi-fi…” and then “Set Up a New Wireless Network”.
Enter the name of the network (e.g. raspberrypi), and select WPA2 Personal. Click next until all the settings are configured correctly.
When finished, click Finish. Your Raspberry Pi should now be able to connect to your Wi-Fi router automatically.
Step 3 – Installing OpenMediaVault
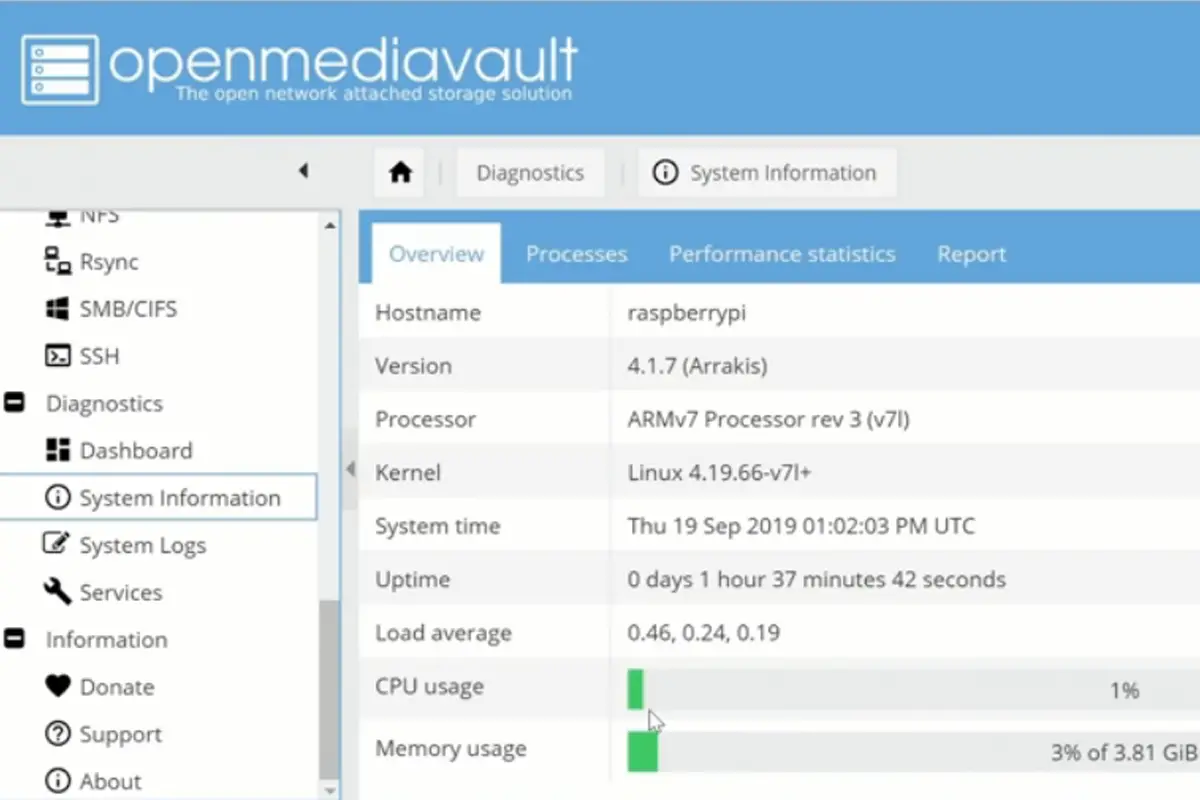
After connecting to the internet, it’s now time to install Open Media Vault. You’ll be prompted to enter your username and password, so do this and then click OK.
You’ll then be taken to the main menu shown above. You can either create a new SD card partition or simply format the entire SD card. To add a new partition, click on the “+” symbol in the lower left-hand corner of the menu.
Now, select “Create new partition table”, then “Ext4 file system” and finally “Mount point” and give it a unique name such as /mts. You can also specify the size of a new partition when creating one.
You can set the default value to be whatever percentage you want. However, if you don’t have enough space, you might want to reduce this to something lower. For example, if your phone has a total storage capacity of 100GB, then you could set the size to 90% (90GB).
Click on the Install Now button when you’re ready, and the installation process will start. It might take a few minutes, so be patient!
Once completed, OMV will start up again and ask you to log back in. Login with the same username and passwords used during the initial setup
Step 4 – Adding Storage Devices
Next, add additional storage devices to the system. Since we already created an external storage partition, we don’t need any additional steps at this point. If you want to add more storage devices to your computer, follow these steps:
- Select the main menu and click “Add Storage Device.”
- Select USB Mass Storage Device from the list of options
- If you want to automatically mount your USB drive when you plug it into your computer, then make sure to select the option labeled “Automount device after adding” and click on “OK”.
- After adding the USB drive, you’ll be notified that the USB drive has successfully been mounted.
Step 5 – Mounting Media Files
By now, you should have everything set up and ready to go. Let’s go ahead and set up some basic settings before we move on to installing applications.
Your IP address may change depending on where you live. If you’re connecting via Wi-Fi, then you’ll need to enter the public IP address of your router instead.
OpenMediaVault defaults to using NFS for storage. You can change this setting under “Network” in the configuration section. If you’d rather use SMB/CIFS instead.
To start, open the file manager, navigate to /home/pi, and then click OK. There should be two folders named “data”, and “media”. This is where all your media files will be stored.
Here’s an overview of the media folders:
- Data – This folder contains the files stored on your hard drive (or SSD).
- Media – This folder contains any media files that are stored on your network-attached storage (NAS) device.
Now that you know how things work, let’s move on to installing applications.
Step 6 – Installing Applications
Next, we’re going to download and install Transmission. First, go back to the application menu and select “Applications.” From there, scroll to the bottom and click on “Transmission BitTorrent client”.
Click on it and then wait for the application to download and install. Once it has finished downloading, click on its icon in the system tray. There are plenty of other applications that can be downloaded from the OMV website too.
Just search for them using Google. To uninstall an installed app, all you need to do is right-click on its app icon on the desktop and choose “Uninstall”. It’s as simple as that.
Accessing OpenMediaVault on the Raspberry Pi
You can access Open Media Vault remotely over the internet or LAN. To access it, just type its IP address into your web browser.
If you’re connecting through a local network, you may also want to forward port 8080 on the router to allow remote access to OpenMediaVault.
You can also access OpenMediavault locally. To do so, plug in a monitor, keyboard and mouse to your Raspberry Pi and then turn it on (see also ‘How to Turn on the Raspberry Pi 3 After Shut Down‘). Press Enter when prompted. When you first start up your computer, you’ll be prompted to log in as root.
After logging in, the OpenMediaVault Home Screen will appear. You should then be able to browse the file system just like any other Linux computer (see also ‘Can Linux Read NTFS?‘).
To view the contents of the USB drives connected to your Raspberry Pi, first you’ll need to enable the USB ports in the configuration section. Click on the “Storage” tab, then click on “External Drives.”
You’ll see a listing of all the devices connected to your system. From the dropdown menu, select one of these devices and click on “Enable storage device”. When you mount the drive, now you’ll be able to access its contents.
Adding New Users On Openmediavault On The Raspberry Pi
Let’s say you want to add another user account for your Raspberry Pi. To do so, you’ll first need to log out of OpenMediaVault and then log back in again.
When you get back to the main menu, click “Users & Groups”. Next, click “Add User” to add a new user A new window will appear asking you to enter some information about the new user; for example, their name, email address, etc.
Make sure to enter their username and password correctly! Click on “OK” to save the changes. You’ve just created a new user account!
Upgrading Openmediavault On A Raspberry Pi
If you have a later version of OpenMediaVault installed than the one you initially downloaded, you’ll need an updated version before you can update it to the latest version.
If you already have a previous version of OpenMediaVault installed, you shouldn’t need a new one.
Make sure you don’t delete any old versions of OpenMediaVault before installing the new one!
To upgrade, open Terminal by pressing Ctrl+Alt + T and type: “sudo apt- get update && sudo apt-get dist -upgrade”.
This will automatically download and install any available updates, and it should only take a few minutes. Once you’ve finished, restart your computer (see also ‘How to Restart Raspberry Pi Remotely‘).
Final Thoughts
So now you should have an idea as to how to go about setting up OpenMediaVault on a Raspberry Pi, as well as an idea as to what OpenMediaVault does and how to do things such as upgrading the system and adding on new users. So what are you waiting for, go and get started!