
Raspberry Pi is a tiny computer that costs less than $35. It has become very popular because of its low price and ease of use. If you want to control your Raspberry Pi remotely from another device, then you should read this article.
Raspbian (see also ‘What Version Of Raspbian Do I Have?‘) is the operating system for Raspberry Pi. This OS comes preinstalled with several useful tools such as SSH client, VNC viewer, etc.
In this article, we will show you how to install these tools on Windows, Linux, or macOS.
By using remote desktop software you will be able to access your Raspberry Pi remotely. There are two types of remote desktop software: local and cloud-based.
Local means you need to download and install the software on your PC. Cloud-based means you don’t need to download anything. Instead, you connect to the server via the Internet.
So, are you ready to take a look at how to set up your Raspberry Pi remotely? Let’s get started!

What Is Raspberry Pi?
The Raspberry Pi is a credit-card-sized computer that plugs into your TV or monitor and turns it into an affordable, low power consumption desktop PC. It’s designed to be used as a learning tool for children and adults alike.
How Does Raspberry Pi work?
The Raspberry Pi was created by Eben Upton in 2010. He wanted to create a cheap, easy-to-build computer that could help people learn about computers and introduce them to information technology in a simple and easy way.
The Technical Bit…
The Raspberry Pi consists of a single-board computer called Raspberry Pi Model B. It uses Broadcom’s BCM2836 SoC which includes ARM1176JZFS CPU clocked at 700MHz, VideoCore IV GPU core clocked at 400 MHz, 512 MB DDR2 RAM, 4 GB eMMC flash memory, and Bluetooth 2.1 + EDR.
It also has 802.11 b/g Wi-Fi, USB 2.0 host port, HDMI 1.4 output, 40 GPIO pins, an RCA composite video out. Its dimensions are 65 x 35 mm and weigh just over half a kilogram.
Why Should You Buy A Raspberry Pi?
There are many reasons why you should buy a Raspberry Pi. As a first computer for children or those looking to familiarize themselves with computing, it is a worthwhile option. Here are some of the other reasons why Raspberry Pis is a great choice:
- It’s Inexpensive – A Raspberry Pi Model B can cost only around $35.
- Size – It’s small enough to fit in almost any space.
- Power – It’s powerful enough to run most home applications.
- Assembly – It’s easy to assemble and is super user-friendly.
- Compatibility – It’s compatible with other platforms like Android, iOS, and Windows.
- Performance – It’s secure and reliable.
How To Set Up Raspberry Pi Remote Desktop On Windows/ Linux/ Mac (5 Methods)
If you want to set up a remote desktop connection between a Raspberry Pi device and another computer, here are five methods for doing so. Let’s go through each one in detail:
- Install X11 Forwarding Software on Your Computer
- Enable SSH Server on Raspbian
- Connect Raspberry Pi to Your Network
- Use Putty to Access Raspberry Pi Remotely
- Use TeamViewer
1. Install X11 Forwarding Software On Your Computer
The first step is to install the X11 forwarding application on your computer.
Once you have downloaded the tool, run the.exe file. You will be prompted to enter an administrator password. Enter the password and click OK. The program will now start installing itself.
When the installation completes, you will see a message saying “X11Forwarding enabled”. Click Yes to confirm. Now you can open any window on your computer and view it on your Raspberry Pi.
2. Enable SSH Server on Raspian
Now we need to enable the SSH server on our Raspberry Pi. To do this, open the terminal on your Raspberry Pi and type and press ENTER. A new line will appear at the bottom of the screen. Type and press ENTER again. Press Y to continue.
Now, you have successfully installed the SSH server on your Raspberry Pi. Next, you need to configure it to allow connections from other devices. Open the config file located inside /etc/ssh/sshd_config using nano editor. Find the following lines and change them to look like this:
- Allow users of group ‘pi’ to log into ssh without a password
- AllowUsers [email protected]
- PasswordAuthentication – yes
Next, save the changes made to sshd_config using Ctrl+O and then hit Enter. Finally, restart the SSH service using sudo service ssh reload.
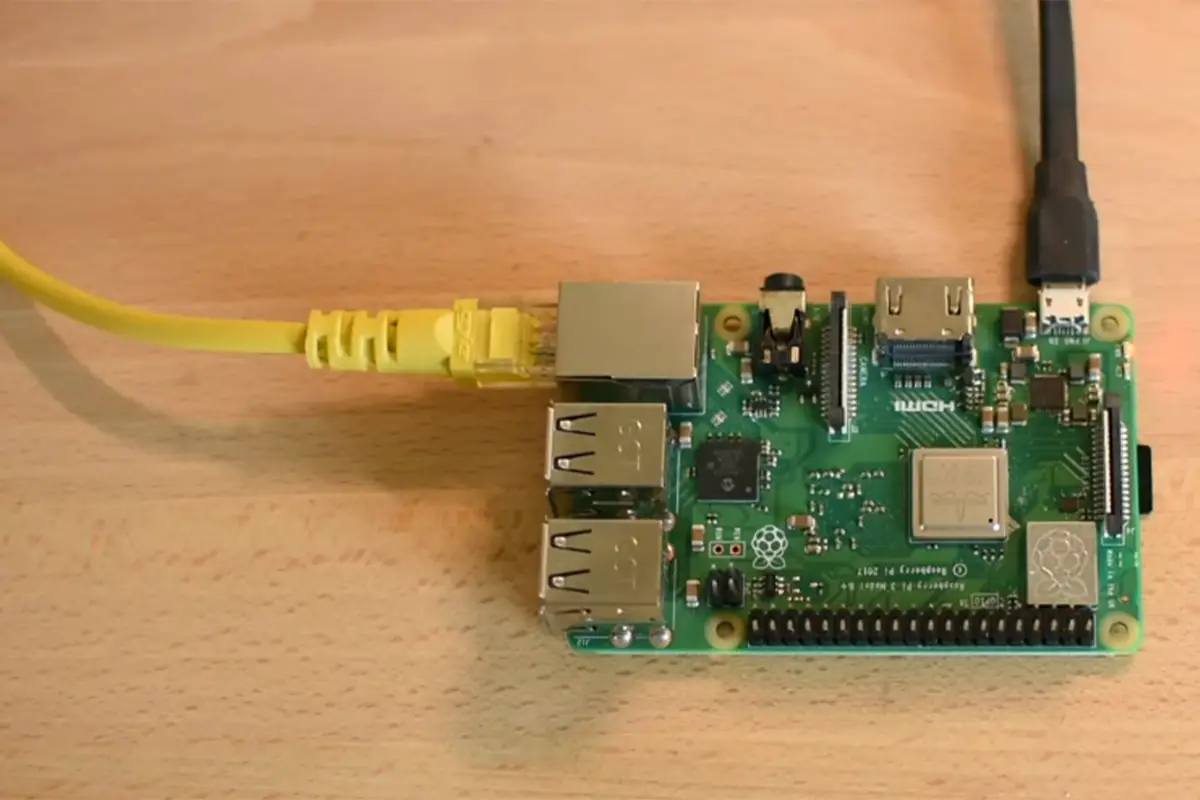
3. Connect Raspberry Pi To Your Wi-Fi Network
You can easily connect your Raspberry Pi to your home network using a wired Ethernet cable. However, if you wish to connect it wirelessly, you will need to buy a wireless dongle.
First, make sure both devices are connected to the same wireless network.
If they aren’t, you’ll need to change their settings. Select Wifi Settings in the top right corner of the screen. Then scroll down and select Advanced Settings.
In the Network Name field, enter the name of the wireless network you’d like to connect to. For example, I’m using a network named “Home.” Scroll down and click Save Changes. Now switch back to the Raspberry Pi’s main menu and select Connected Devices.
Make sure the checkbox next to Home is selected. Press OK. On the target device, open a web browser and go to 192.168.1.103:8080.
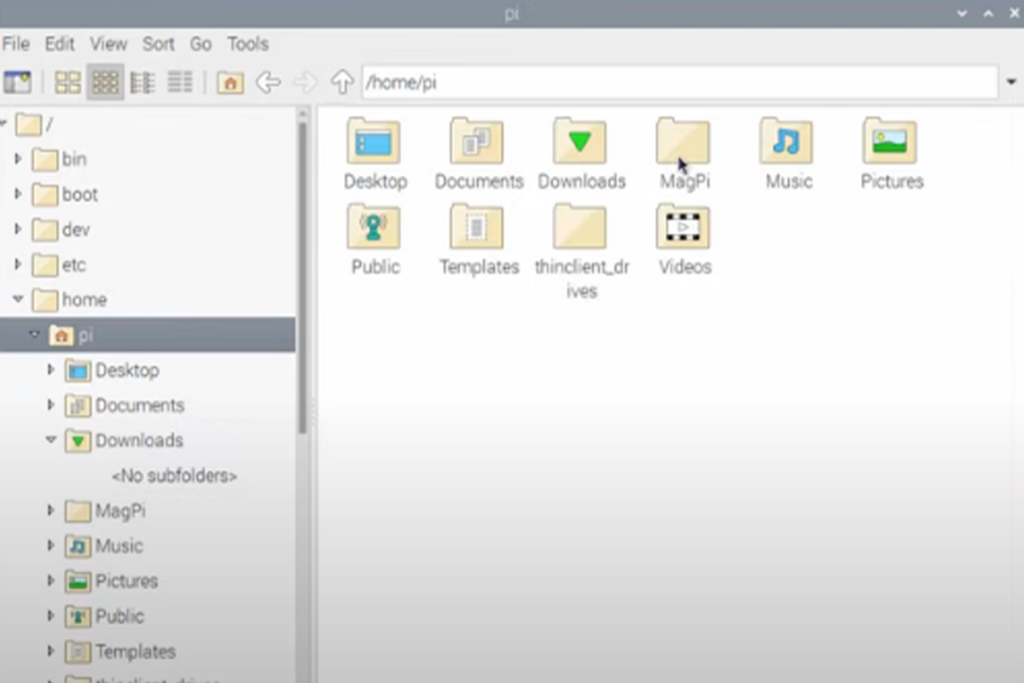
Enter your TeamViewer username and password and press Login. Once logged in, you’ll see a list of all available devices on the network. Find the Raspberry Pi and double-click it. A file manager window will pop up with all the folders stored on the Raspberry Pi.
Navigate to the folder containing the files you wish to transfer and drag them into the window.
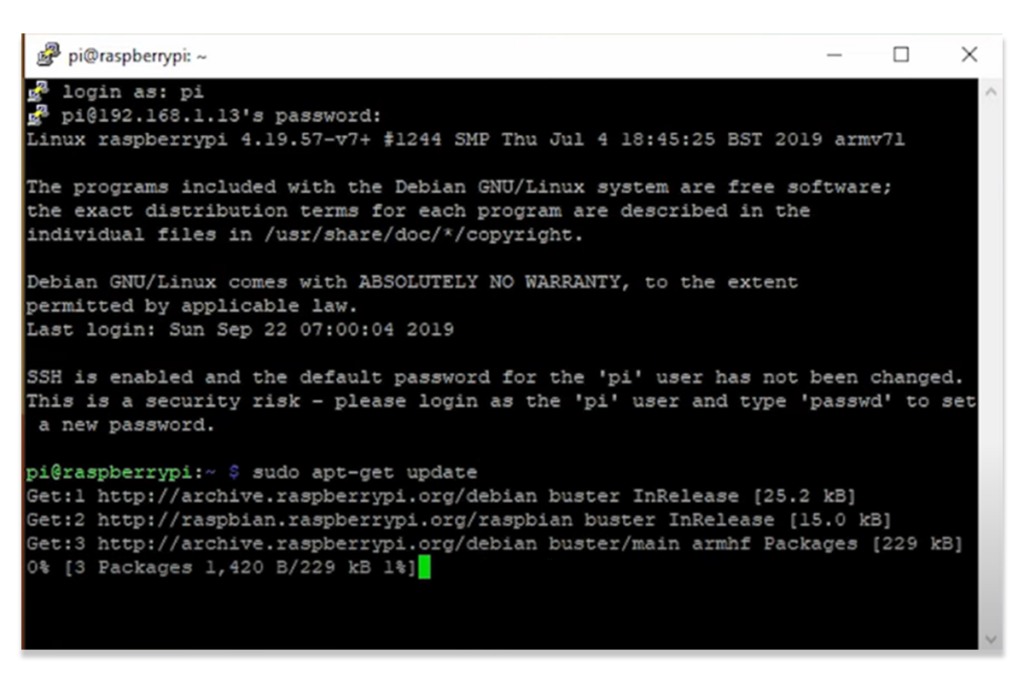
4. Use Putty to Access Raspberry Pi Remotely
This tutorial will show you how to access your Raspberry Pi remotely using the Putty SSH client. This is a very useful tool for when you need to troubleshoot or debug issues with your Raspberry Pi, and it’s also great for testing out things before installing them on your Raspberry Pi.
First, download the latest version of putty. After downloading it, extract it somewhere safe so that you don’t lose any files.
Once extracted, launch putty and select SSH from the list. On the next screen, enter the IP address of your Raspberry Pi. For example, 192.168.0.10. The default port number is 22. Click OK.
Now, you will be prompted for a username and password. Type in the credentials for the user account you created earlier.
Now, you will be asked to confirm the connection details. Make sure you type the correct IP address of your RaspberryPi. And make sure you remember the password you chose.
If everything goes well, you will now be logged into your Raspberry Pi remotely.
To disconnect, simply press CTRL + C.
Note: If you want to change the settings of the Putty application, right-click on it and select Properties. In the General tab, you will find the following options:
- Host Name – Enter the hostname of your Raspberry Pi.
- Port Number – Enter the port number of your Raspberry Pi. By default, it is 22.
- Authentication Method – Select either Password or Public Key.
- Login Window Size – Change the size of the login window.
- Connection Timeout – Adjust the timeout period for connecting to the server.
- Use SSL – Enable or disable the use of secure sockets layer encryption.
- Socks Server – Specify the socks proxy server to use.
- Proxy Settings – Configure additional proxies if necessary.
- SSH Agent Forwarding – Allow the use of agent forwarding.
- SSH Tunnel – Create a tunnel through which data passes between the local system and the remote host.
- Local Echo – Turn on or off local echo mode.
- Telnet Encoding – Choose the encoding method used by telnet protocol.
- Escape Characters – Enter the characters to be interpreted as escape sequences.
- Terminal Emulation – Select whether to emulate a VT100 terminal or not.
- Scrollback Lines – Increase or decrease the number of lines remembered by the terminal emulator.
- Scrollbar – Display scrollbars or not.
5. Use TeamViewer To Access Raspberry Pi Remotely
Teamviewer is an easy-to-use remote control application that allows you to connect to your PC or Mac from anywhere in the world.
You can share your screen, control your mouse and keyboard, take screenshots, record video, and more.
Teamviewer works on any device running Windows, macOS, iOS, Android, Chrome OS, or Linux. Downloading the 32-bit version of the software…
To connect to your Raspberry Pi via TeamViewer, first, install the software by running the following command: sudo apt-get install Teamviewer.
Then run the following command to create a password for the Raspberry Pi user: sudo teamviewer setup.
Once you’ve created a password, you’ll be able to connect using the following command: sudo teamviewer raspi_ip_address You should now see the Raspberry Pi desktop appear.
Connecting From Linux
To enable remote access to Raspberry Pi, you need to use SSH and give the parameter “-X” when logging into the device. For example, to log into the Raspberry Pi with ssh [email protected] -X, enter the following commands:
- ssh [email protected] -X
- sudo su
- echo “pi ALLexit
Now, you can log into the Raspberry Pi using SSH without providing a password. To do this, just type the following command: ssh pi@192. 168. 1. 101 -X. If you want to disconnect, simply type exit.
Connecting From Windows
You can also connect to Raspberry Pi from Windows 10 using Putty. To do this, install Putty and open it. Click New Session and Type raspberrypi.local in the Host Name field and then click Add.
In the Port number field, type 22 and then click OK. In the Authentication tab, select RSA from the dropdown menu and then click Next.
In the User name field, type pi and then click Next. Type the same username and password you entered earlier in the Password text box. Click Test Connection and then click Open.
The connection will be successful and you can get started!
Connecting From iPhone/ iPad
If you have an Apple device, you can use Screen Sharing to connect to Raspberry Pi remotely. First, download the free app called Screen Sharing from the App Store. Connect your phone or tablet to your computer over Wi-Fi or Bluetooth.
On your computer, launch Screen Sharing and then click Settings. In the General section, make sure that allowing other users to view your screen is checked. Now, turn on the Raspberry Pi’s camera and microphone.
On your phone or tablet, go back to the Home screen and tap the Camera icon. Tap the Record button at the bottom right corner of the screen.
A red dot will appear next to the Record button. Tap the red dot to start recording. When you’re done recording, tap Stop Recording. Your screen will show up on the Raspberry Pi.
Connecting From Chromebook
Chromebooks are Google devices that run the Chrome operating system. They are very similar to laptops but they don’t have physical keyboards so you must use touch screens instead. To connect to Raspberry Pi from a Chromebook, follow these steps.
Click Devices.
Find the Raspberry Pi and double-click it. This will bring up a window where you can control the settings of the Raspberry Pi.
Click the Advanced Options link. Scroll down to Enable X11 forwarding. Check the checkbox and then click Apply.
Close the window.
Now, restart the Raspberry Pi by clicking Restart.
Go back to the Chromebook and sign in.
Click the gear icon in the top left corner of the browser. Under Network, find the option Use advanced networking options.
Make sure that ‘Automatically detect network connections’ is selected.
Click Save changes.
Open a web browser and navigate to 192.168.1.100. You should see a login prompt for Raspberry Pi.
Enter the username pi and then press Return. You’ll now be able to access the Raspberry Pi through the browser.
Connecting From Android Device
Android phones and tablets come with a built-in remote desktop client called VNC Viewer. Follow these steps to set up your Android device as a remote desktop client:
Launch VNC Viewer. Select Raspberry Pi from the list of available servers.
Then, enter the IP address of the Raspberry Pi (see also ‘How to Find Raspberry Pi IP‘) into the hostname field.
Finally, enter port number 22 into the port field. If you want to log in automatically when the Raspberry Pi boots, check the Auto Login box.
Press Connect.
That’s all there is to set up a remote desktop client on your Android device!
Connecting From Mac
For Mac Os, download the standalone software from the Apple website and install it. Then launch it and connect with your Team Viewer ID and password that you set.
Install it with the Package Manager and start it from the Start Menu. Log in if you have an account, type in your Team Viewer ID & Password, and click on Connect. You’ll now be logged into your desktop remotely.
How to Copy Data From a Raspberry Pi to a PC
The Raspberry Pi is an amazing little computer that is perfect for kids and adults who want to learn about computers. However, it also has some great uses in the home or office. One of those uses is copying data from one computer to another using a Raspberry Pi.
There are several ways to do this, including using a USB flash drive, connecting via Wi-Fi, or even using a microSD card.
Here we’ll look at how to copy files from a Raspberry Pi to a Windows or macOS computer. We’ll also take a quick look at what happens when you try to copy data from a Raspberry Pi to an SD card.
Copy Files With a USB Flash Drive
If you already own a USB flash drive, you can easily transfer files between your Raspberry Pi and any other computer. Plug the USB flash drive into both the Raspberry Pi and the target computer.
The Raspberry Pi should recognize the drive and allow you to browse its contents. To copy files from the Raspberry Pi to the computer, simply select them and drag them onto the USB flash drive icon on the desktop.
When finished, remove the USB flash drive from the Raspberry Pi and plug it into the target computer. Now open File Explorer and navigate to the location where you copied the files.
They will appear in the same folder on the target computer.
Transfer Files From the MicroSD Card
You may be wondering why we didn’t mention this as a way to transfer files. That’s because there isn’t an easy way to do it. However, if you want to try, you can extract the files from the microSD card and place them on another computer.
Insert the microSD card into a reader or card slot on the target computer. Open a text editor such as Notepad and paste the following lines into the document. Be careful not to overwrite anything important!
- !/bin/bash
- sudo dd bs1M if/dev/zero of/dev/sdX conv noerror status progress
- rm -rf /media/$USER/Downloads/*
Now save the file as something like “transfer_files.sh” and make sure it’s executable by right clicking on it and selecting Properties.
Now go back to the Raspberry Pi and run the script (see also ‘Can Raspberry Pi 4 Run PS2‘). It should ask for your Team Viewer ID. Once you’ve connected, you should see a progress bar indicating the transfer speed. When done, you’ll get a message saying that the files were successfully transferred.
Frequently Asked Questions
What Are The Benefits Of The Raspberry Pi?
The Raspberry Pi is a small, credit-card-sized computer that plugs into your TV and allows you to do all sorts of things. It’s cheap, it’s fun, and it can be used for many different projects.
It comes with a variety of preloaded software that makes it very easy to use. You don’t need to know much about programming to start doing cool stuff with it.
Why Should I Use A Raspberry Pi Over Other Small Computers?
A Raspberry Pi is cheaper than most computers. It costs $35 and includes everything you need to get started. If you have an old laptop lying around, you could probably turn it into a Raspberry Pi.
Raspberry Pis are smaller than most laptops. They fit in your pocket and they’re great for travel.
Raspberry Pi has more memory than most laptops. It has 512MB of RAM compared to 128MB found in most laptops. This means you can store lots of programs and data without worrying about running out of space.
Raspberry Pi has a faster processor than most laptops. Its 1GHz ARM Cortex A7 CPU is twice as fast as Intel Core i3 processors.
Raspberry Pi also has better graphic capabilities than most laptops. It supports OpenGL ES 2.0 which gives it a lot of power when it comes to 3D games.
How Do I Enable The Raspberry Pi Server?
To do this, open the Raspberry Pi configuration tool, go to the “Interfaces” tab and check the “Enabled” box on the VNC line.
What Is XRDP?
XRDP is an open-source remote desktop protocol server, which allows you to connect to the Linux desktop from any operating system.
How Do I Install XRDP?
All you have to do is run the following command: sudo apt-get install xrdp
XRDP is now installed on your Raspberry Pi, so you can manage it with the usual command: sudo service xrdp start | stop | restart | status.
Conclusion
As you can see from this article, Raspberry Pi is a very good, versatile, and reliable computer to use if your budget is tight. It is also a great option to introduce kids to computers, or for those who are not comfortable with computing software or systems.
Hopefully, we have armed you with the information necessary to get you started, along with some hints and tips to make your user experience even better.
If you are looking to get started with a small, user-friendly, and reliable computer, then we would highly recommend the Raspberry Pi. Similarly, as a gaming tool, or for educational uses, it really is a great option.
The fact that it can be carried in your pocket or purse is another added bonus! Happy computing!