
The Raspberry Pi can be used for multiple purposes, whether it’s for learning programming skills, building hardware projects, or automating your home.
However, it can also be used to capture and record photos and videos with the help of a Raspberry Pi camera module.
So, if you’re wondering how to view Raspberry Pi cameras then don’t worry! In this post, we’ll discuss everything you need to know about using a camera module with your Pi device.
Let’s dive right in!
What Is A Raspberry Pi Camera?
Before we talk about how to view Raspberry Pi cameras, it’s important to talk about what a Raspberry Pi camera is and what it can be used for.
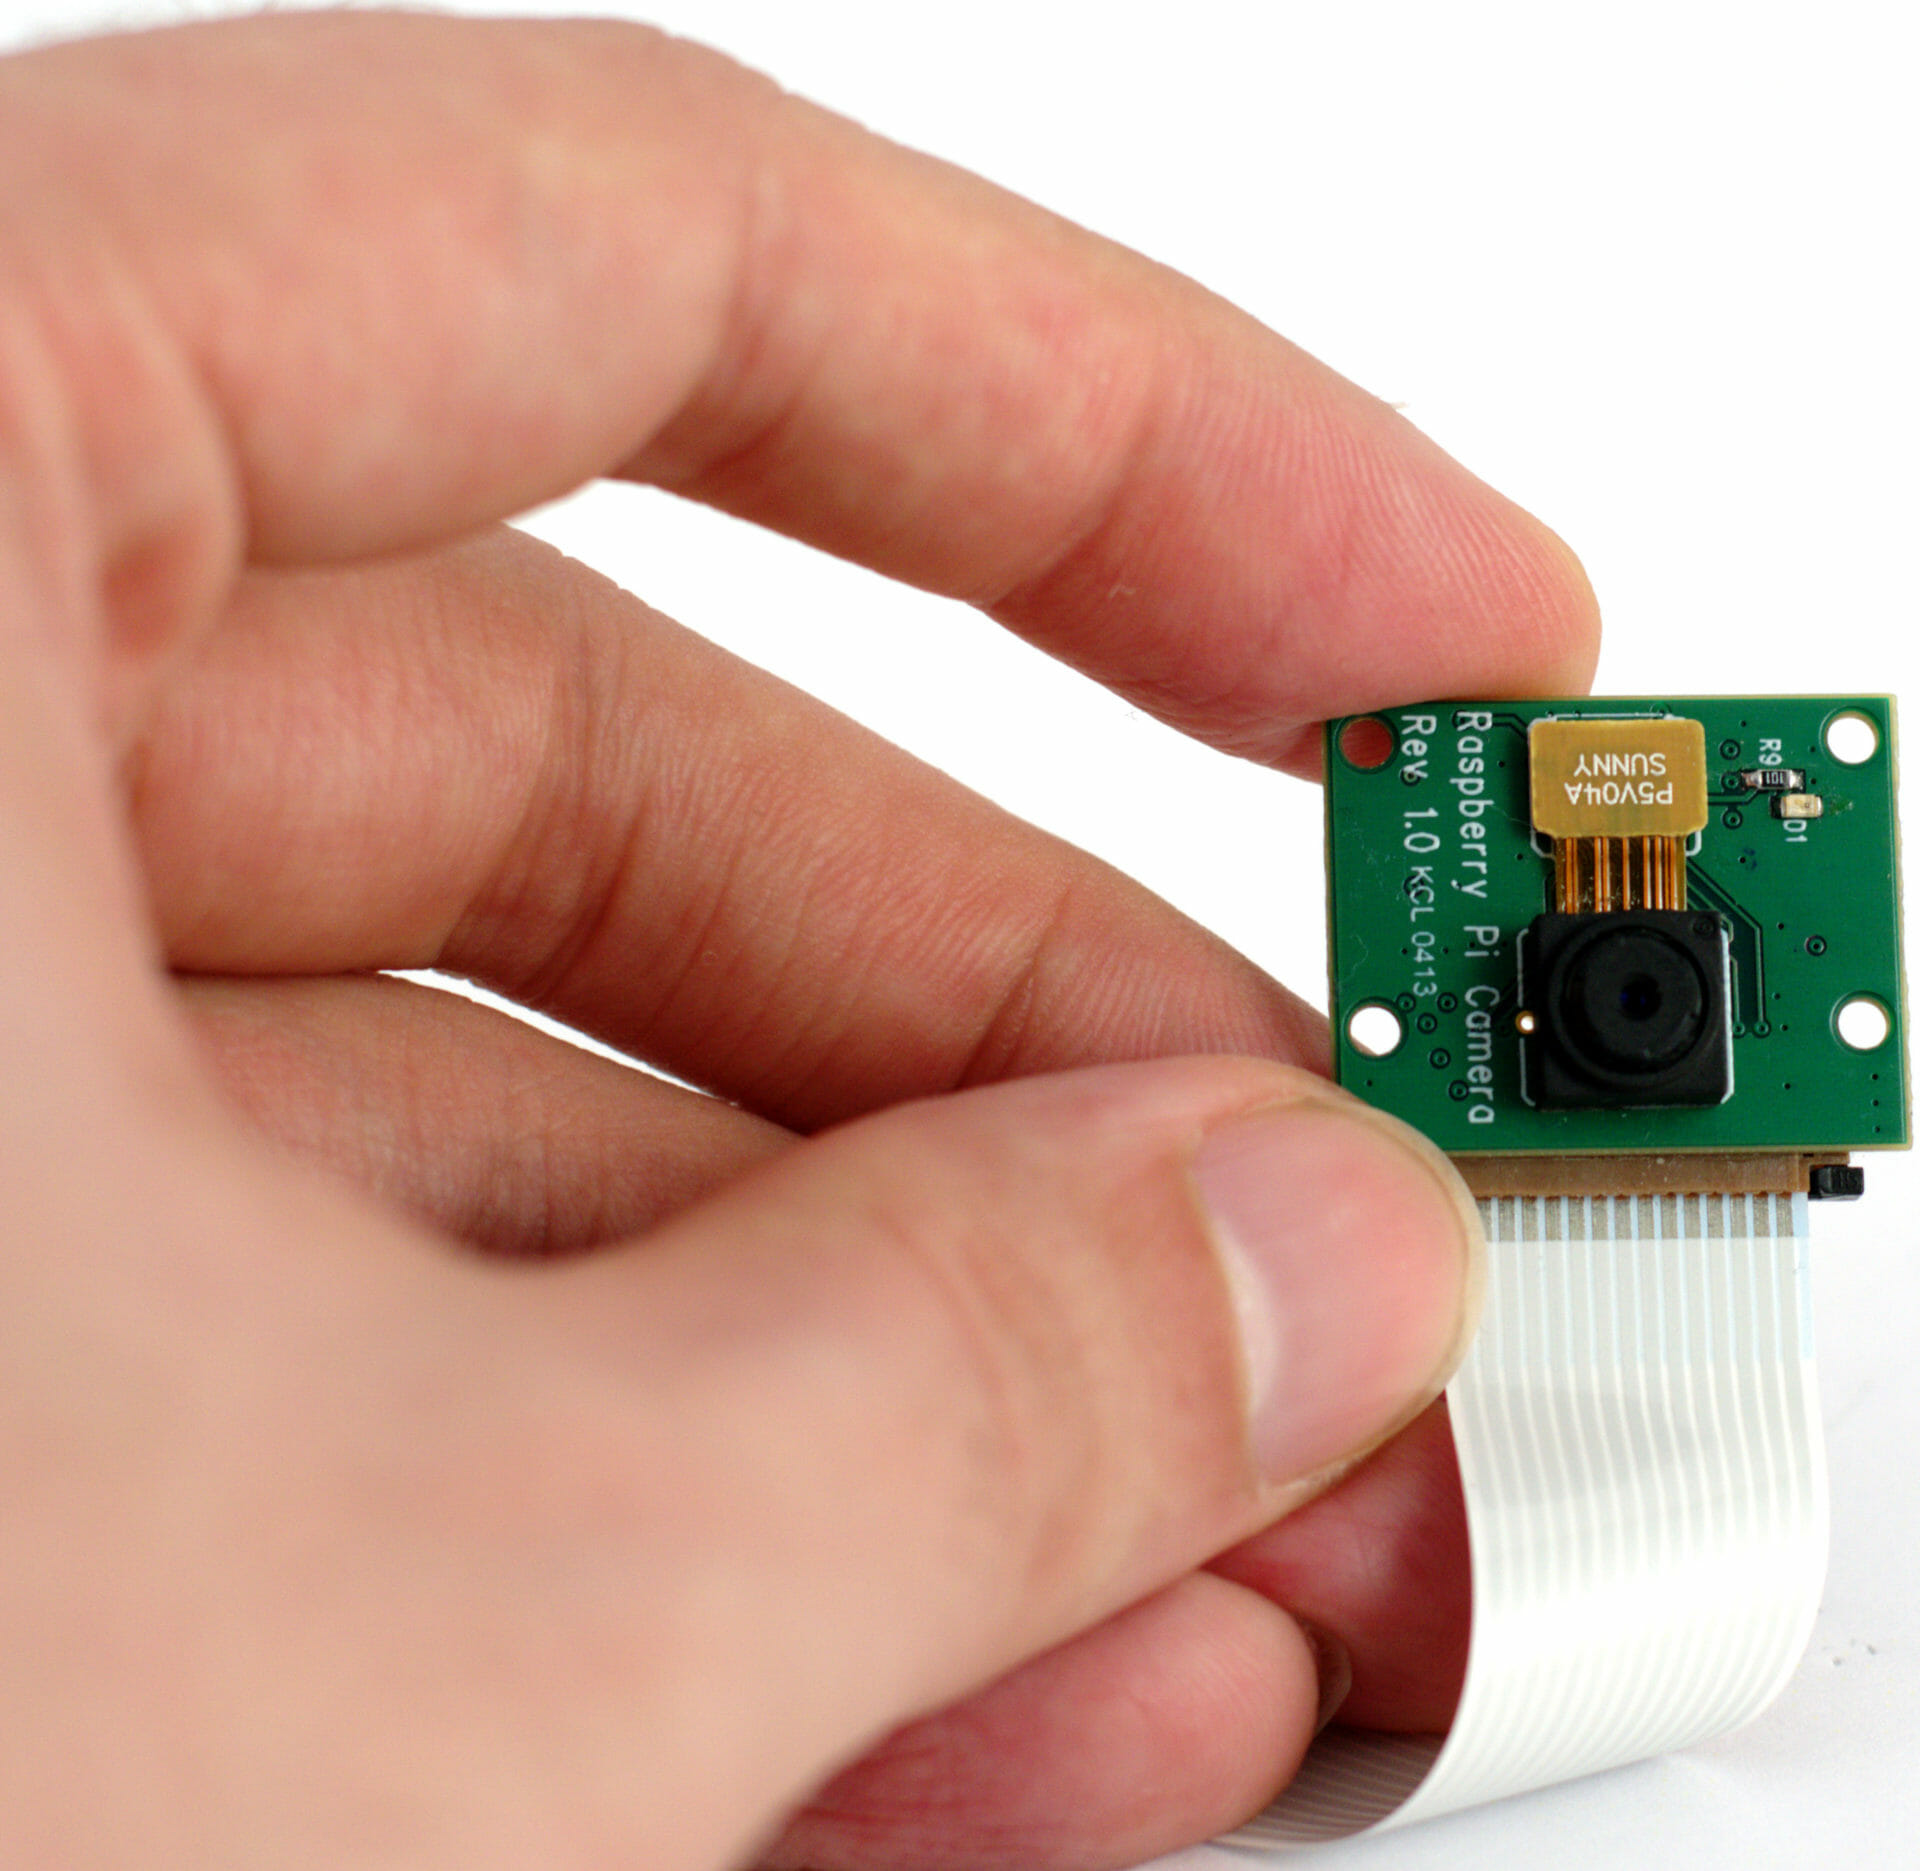
Put simply, a raspberry pi camera is a tiny camera that can be connected to your Pi using a CSI ribbon cable. Once connected, you can pretty much use it like any other camera device you own.
Click Here For The Best Raspberry Pi Gear & Accessories!
Apart from simply using this tiny camera for taking photos and recording videos. You can also turn it into a real-time Raspberry Pi camera. In this way, it can be used to function as a portable surveillance system as well.
Now, let’s talk about how to install the Raspberry Pi camera.
How To Install A Raspberry Pi Camera?
It’s pretty straightforward to install a Raspberry Pi camera. But before we get started make sure you have:
- A functioning Pi Camera Module, like the Raspberry NoIR or the Standard V2 Camera module.
- A modern Raspberry Pi device with a working camera port.
- Raspbian, Raspbian Lite, or any other functioning OS installed on your device.
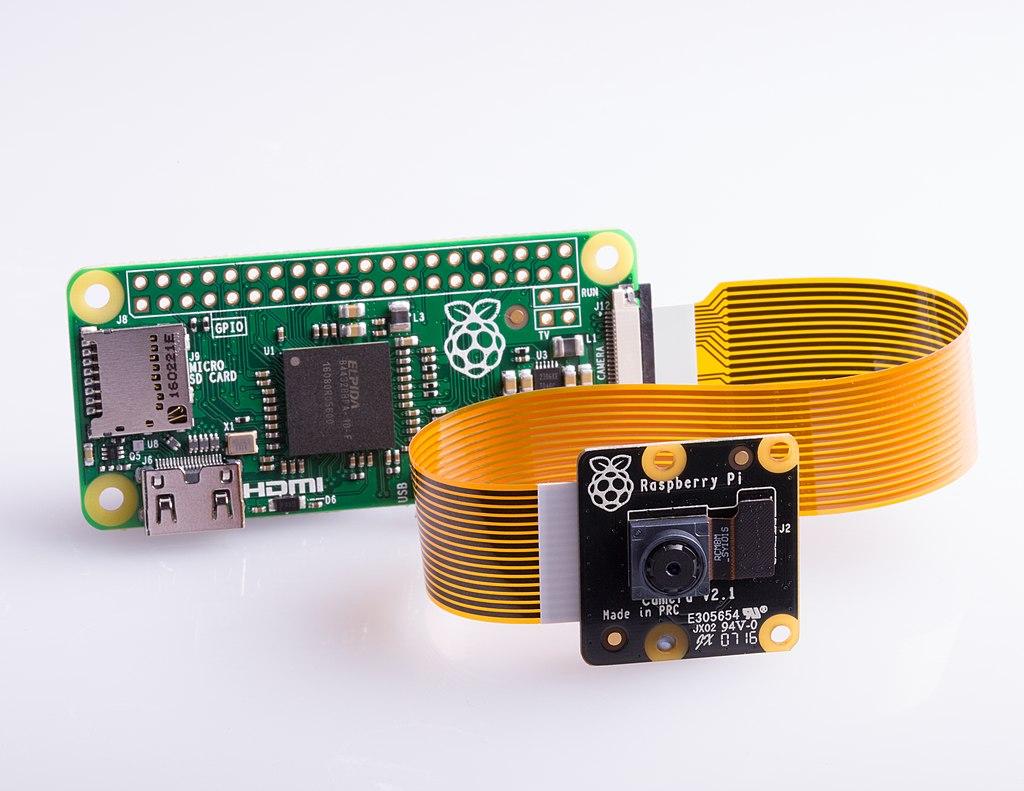
Top Tip: If you’re using a Raspberry Pi Zero, make sure to get a camera module cable that fits the smaller port size in the Pi Zero.
Once you have everything you need, follow the steps below to connect the Pi camera to your device.
-
Find the camera port on your device. This is usually located between HDMI and Ethernet ports.
-
Insert the flex cable of your raspberry pi camera inside the camera connector. To do this, you’ll have to open the connector by pulling the clips on the top of the connector upward.
-
When it is open, insert the flex cable inside the connector and make sure the connectors on the cable are aligned properly with the port contacts. Then, close the connector by gently pushing the clips down, back into place.
-
Gently pull the flex cable to ensure it is connected nicely.
-
You’re all set to go.
Note: Raspberry Pi camera cables are very delicate. That’s why it’s so important to make sure they’re not bent. Unnecessary and excessive bending may damage the wires inside so be extra careful when connecting the module to your Pi.
How To Enable A Raspberry Pi Camera?
Now that you’ve connected the Raspberry camera module to your Pi. The next step is to enable the Raspberry Pi camera module.
Here’s how:
-
First, turn the raspberry pi on and then go to the main menu. In the list, you will find an option for preferences. Click on that.
-
Another list will open. Find Raspberry Pi Configuration in that new list and click on it to open it.
-
As the new tab opens, select Interfaces from the options on the screen and find the camera option.
-
Over here, enable your Raspberry Pi camera module by clicking on “Enabled.” Then press OK to complete the process.
-
Now reboot your Raspberry Pi to allow the changes to take effect.
Alternatively, you can also do this using the terminal by simply typing the following line of code.

From the new tab, Select the interface option. Then select the camera and enable it by selecting yes. Finally, press okay and then press escape exiting the raspi config.
Click Here For The Best Raspberry Pi Gear & Accessories!
How To Take Photos With A Raspberry Pi Camera?
Now that you’ve enabled the camera module, let’s talk about how to take photos with a Pi camera.
Here’s how:
-
Open a terminal window by clicking on the blank monitor taskbar icon.
-
As the terminal window opens, type the following code and press enter to take a still picture.
-
-
The camera preview will open for a few seconds before it captures the picture. Then, the raspberry pi camera will create and save a picture file on your desktop.

How To Adjust The Height And Width Of A Still Picture Using Raspberry Pi Camera Module?
The Raspberry Pi also offers impressive features which allow you to adjust the height and width of your picture. For this purpose, you can add -h and -w properties in your terminal code.
For example, if you want to create a picture with 720 as width and 480 as height, you can write this in the line of code as follows.

Click Here For The Best Raspberry Pi Gear & Accessories!
How To Take Videos Using A Raspberry Pi Camera?
You can also record videos using your raspberry pi camera. It’s just as easy as taking a still picture, all you have to do is to run the following command line on your terminal to record a video.

As a result, a video file named video.h200 will be created on your desktop. Then, you can double-click on that file to open and replay the recorded video.

How To Preview Raspberry Pi Camera Using A Python Code
If you’re a fan of Python you’ll be happy to know that you can also access and control your raspberry pi camera using python.
-
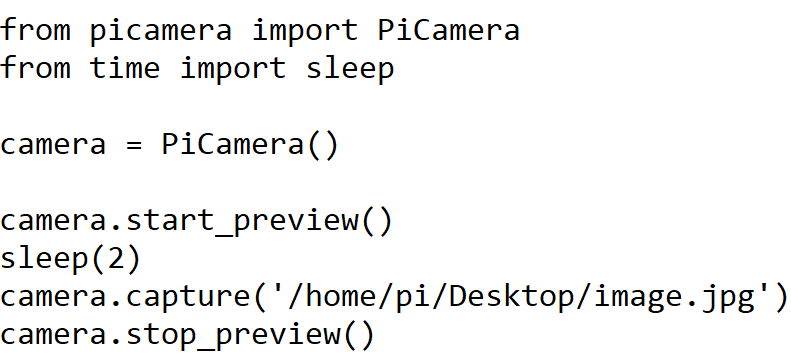
For this method, you first need to open a python editor on your raspberry pi.
-
Then create a new file and name it camera.py.
-
Now, type the code mentioned below and run the program.
-

If you’ve inputted the code above correctly into your editor, you’ll be able to see the camera preview for 60 seconds.
However, if you want to increase the raspberry pi camera preview time, you can do this by increasing the number of seconds written in the brackets next to “sleep.”
After the input time (in this case 60s) is completed, your raspberry pi camera will automatically close.
How To Rotate Your Raspberry Pi Camera View With A Python Code
You can also rotate your raspberry pi camera view with a python code. For example, if your raspberry pi camera shows you an inverted preview, you can use the following Python command to adjust the orientation.

After running this code in your python editor, your pi camera image should be rotated by 180 degrees.
Raspberry Pi allows you to rotate your camera by 90, 180, and 270 degrees. You can also reset the rotation of your pi camera image by setting the rotation to 0 degrees.
How To Take Still Pictures With A Raspberry Pi Camera Using A Python Code
Earlier, we discussed taking still pictures using the raspistill code in the Raspberry Pi terminal. This section will show how you can take still photographs using python code.
To take a still picture on your Raspberry Pi camera using Python, write and run the following Python command.
Top Tip: Always set the sleep time to at least 2 seconds. This is necessary to ensure that the camera light sensor has enough time to accurately assess ambient light levels.

How To Record A Video With Raspberry Pi Camera Using Python?
Previously, we discussed recording a video using the raspivid command in your pi terminal. Now we’ll discuss how to capture a video with your Raspberry Pi using python code.
To capture a video, simply write and run this code on your raspberry pi.

After running the code above, your raspberry pi camera preview will open for 60 seconds, and a video of 60 seconds will be recorded and saved on your desktop.
Remember, you can always increase the time of your video recording by typing in your desired time in seconds in the brackets against “sleep” while writing the code.