

When it comes time to capture video with the Raspberry Pi, there are a few options available. In this post, we will explore how to capture video in Raspberry Pi using a camera module. We’ll also discuss how to view those videos once they’re recorded.
Let’s get to it!
What You Need To Capture Video With A Raspberry Pi
Before we get started, here’s a list of the things you’ll need to record video in Raspberry Pi:
- A working Raspberry Pi
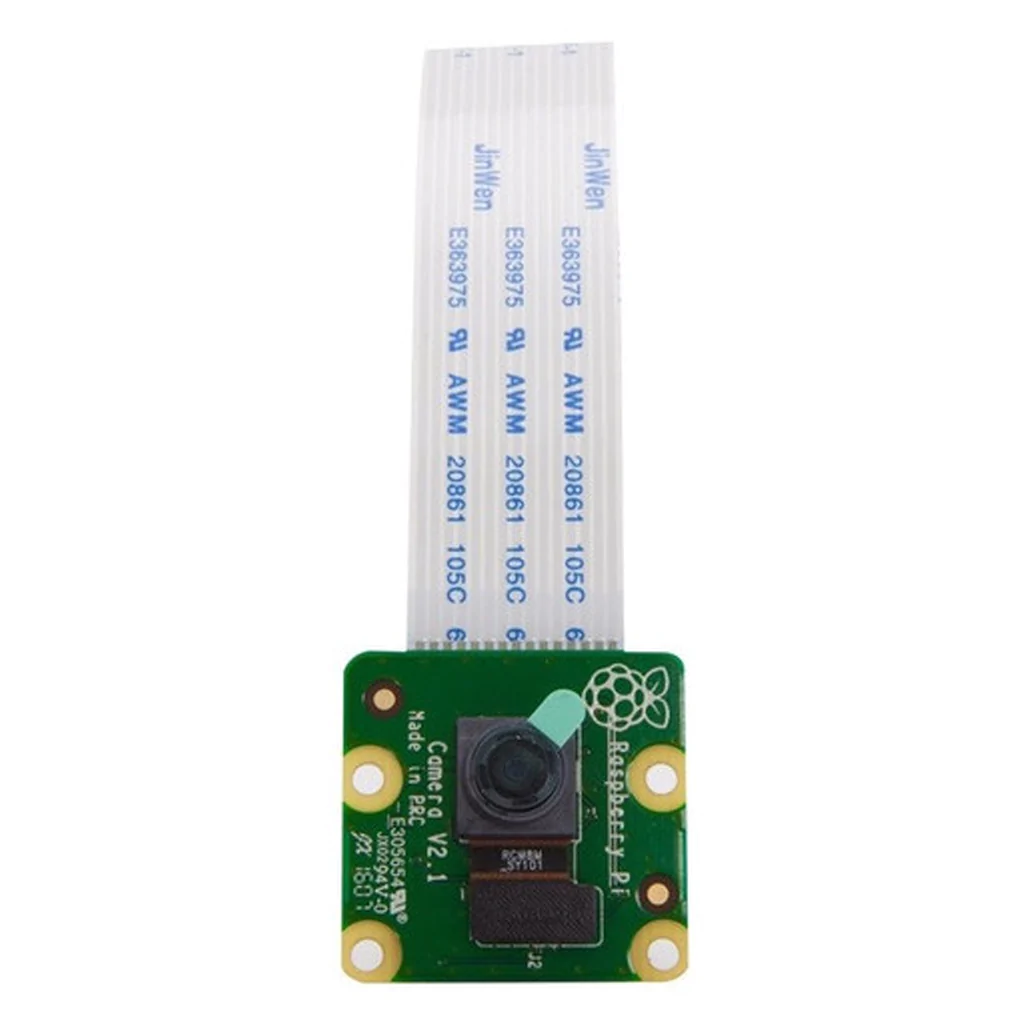
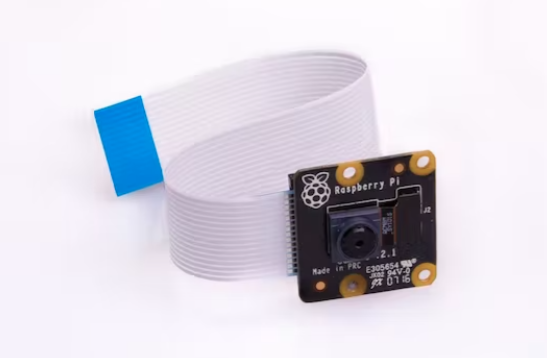
- A Raspberry Pi camera module such as the Standard V2 camera module or the Raspberry NoIR
- A functioning OS like Raspbian running on your Pi device
- A relatively large SD card to store videos on Raspberry Pi
- A suitable USB power supply (for power)
- An HDMI cable (optional, for connecting to an external monitor)
Click Here For The Best Raspberry Pi Gear & Accessories!
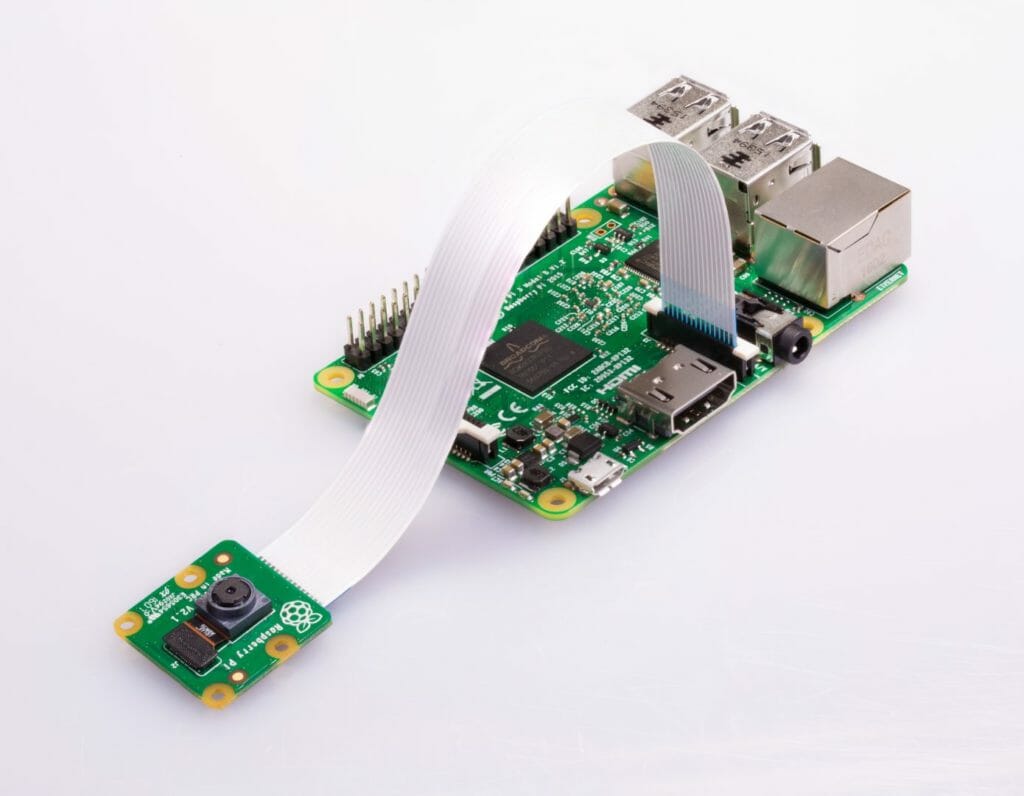
How To Connect The Camera Module
Locate the camera port on your Pi.
On most Raspberry devices it’s usually located between the Ethernet and HDMI ports.
Plug the cable of your camera module in.
You might need to open the connector by pulling the clips on the connector upwards. After inserting, make sure to close the connector by gently pushing the clips back down, and give the flex cable a gentle pull to make sure it’s connected properly in place.
Enable the camera module
Go to the Raspberry Pi Configuration tool from the main menu, then click on the interfaces section and select the enable option from the camera.
Once you’re done, you should be able to capture video in Raspberry Pi using your camera module.
Top Tip: Be gentle when handling your camera module’s cables as they’re usually quite fragile and easy to bend. Bending it too much may damage the wires inside and cause static lines to appear in the camera’s viewfinder.
Click Here For The Best Raspberry Pi Gear & Accessories!
How To Capture Video With A Raspberry Pi
Now that you have the camera installed and connected, it’s time to record video in Raspberry Pi. To do this, you can use a few different methods available on Raspbian OS.
The two most popular ones are using raspicam and picamera.
Both of these options are highly versatile, allowing a variety of recording options, and lets you adjust various camera settings like the:
- Saturation
- Brightness
- Exposure
- ISO
- Shutter speed
- Contrast
- White balance
Capture Video With A Raspberry Pi With raspicam
The native raspicam command tools let you directly control the camera module through the command line. So it’s a great place to start if you want to capture video in Raspberry Pi.
For example, if you want to use it to take a photo, capture a timelapse, or record a video, open up a terminal and type in the following commands respectively:

Remember you can also use different parameters such as resolution, frame rate, bitrate, and more using raspicam.
Here are a few helpful command line tools for raspicam:
- – h: Sets the frame height (can be set between 64-1080px)
- – w: Sets the frame width (can be set between 64-1920px)
- – fps: To set the frames per second of the video
- – b: Sets the bit rate
Top Tip: Check out Raspberry Pi’s official website to learn more about how to capture video in Raspberry Pi using raspicam.
Capture Video With A Raspberry Pi Using Picamera
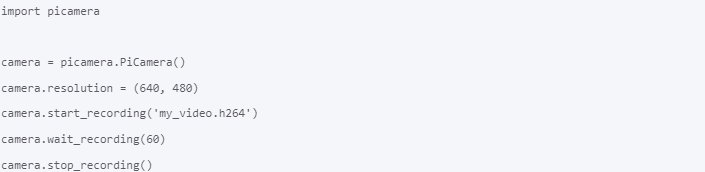
Picamera provides a clean Python interface that allows experienced Raspberry Pi users to write their own scripts for recording videos, timelapses, and to capture consistent images.
For example, you can use picamera to record videos in Raspberry Pi using the following lines of code:
Click Here For The Best Raspberry Pi Gear & Accessories!
How To Play Video In A Raspberry Pi
Now, once you’re done recording videos, how can you play them back on your Raspberry Pi?
Well, for those who prefer to use the command line to play videos, the easiest option is to use Omxplayer (this is pre-installed with Raspbian).
For example, if you want to watch a video called “example.mp4”, open up a terminal and type in the following command:

And if you want to view a sample video that’s already available on your Pi device, use the following command:

This will play a sample of the animated movie Big Buck Bunny that comes preinstalled on your Pi device in fullscreen. To exit, hit Ctrl + C.
Top Tip: If you’re running newer versions of the Pi OS like Bullseye, it’s recommended to use a 3rd party app like VLC player instead of OMXPlayer. This is because Pi OS variants after Buster changed the recording modules.
Can You Use Any USB Camera To Record Videos in Raspberry Pi?
When it comes to capturing video in Raspberry Pi, you can use any standard USB camera that offers good resolution and clarity, the official Pi camera modules like the V2, HQ, and NoIR, or 3rd party Pi camera modules from brands like Arducam.
However, the best cameras for recording videos on Raspberry Pi are usually those compatible with CSI technology. These are usually small, lightweight cameras that can be connected directly to the mainboard of your device via ribbon cables.
And remember, while cameras may differ in their resolution, it is usually the GPU hardware of the Pi and not the camera itself that sets the video recording limits.
This means that in reality the recording capabilities of most cameras (5MB and over) are more or less the same, with 640p at 90 fps, 720p at 60 fps, and 1080p at 30 fps.

Conclusion
There you have it – you now know how to capture video in Raspberry Pi!
As you can see, with a few simple commands, you can record videos with the Raspberry Pi camera module and also play them back on your device. So, be sure to have fun and be creative with your recordings!
And if you ever get stuck, consider checking out our other tutorials such as How To View Raspberry Pi Camera, or Everything You Need To Know About The Raspberry Pi Pico.
If you are a visual learner like me, make sure you watch the video below from Tech With Tim. It’s full of handy tips and tricks for capturing video with a Raspberry Pi.
Happy recording!