
Setting up a raspberry pie can be tricky and annoying, especially if you’re a beginner to the tech. Issues crop up like trying to connect your Raspberry Pi to Wi-Fi or other issues that may be completely random.
Tech is tricky, and the worst thing is that some of those issues that you might come across are completely unheard of, until they happen to you.
However if you’re sure that this is the project that you want to take on, then here are 5 methods that you can follow to try and prevent any unnecessary problems from cropping up.
What Is Raspberry Pi?
If you’re in the process of setting up a Raspberry Pi then you probably don’t need this section, but if you’re only setting it up because you’ve heard of a lot of other people doing it, and don’t really know what it is, then here is a quick explanation.
Raspberry Pi is a series of single-board computers that are made by a foundation in the UK that hopes to create easier access to computing education across the world.
The board helps people learn to code and create their own home automation systems. The programs are all open source which means that you are completely free to create whatever it is that you can.
The Raspberry Pi system is pretty cheap, especially when considering other motherboards that you might need to buy for a computer.
Although it doesn’t do all the things that a regular computer can, it’s very helpful in helping you get comfortable with coding and running a computer in a more educated way.
The foundation relies on the sale of the Raspberry Pi units in order to fund its education sector, as they are a charity. There are plenty of things that you can do with a Raspberry Pi if you put your mind and imagination to it.
Method Number One – Headless
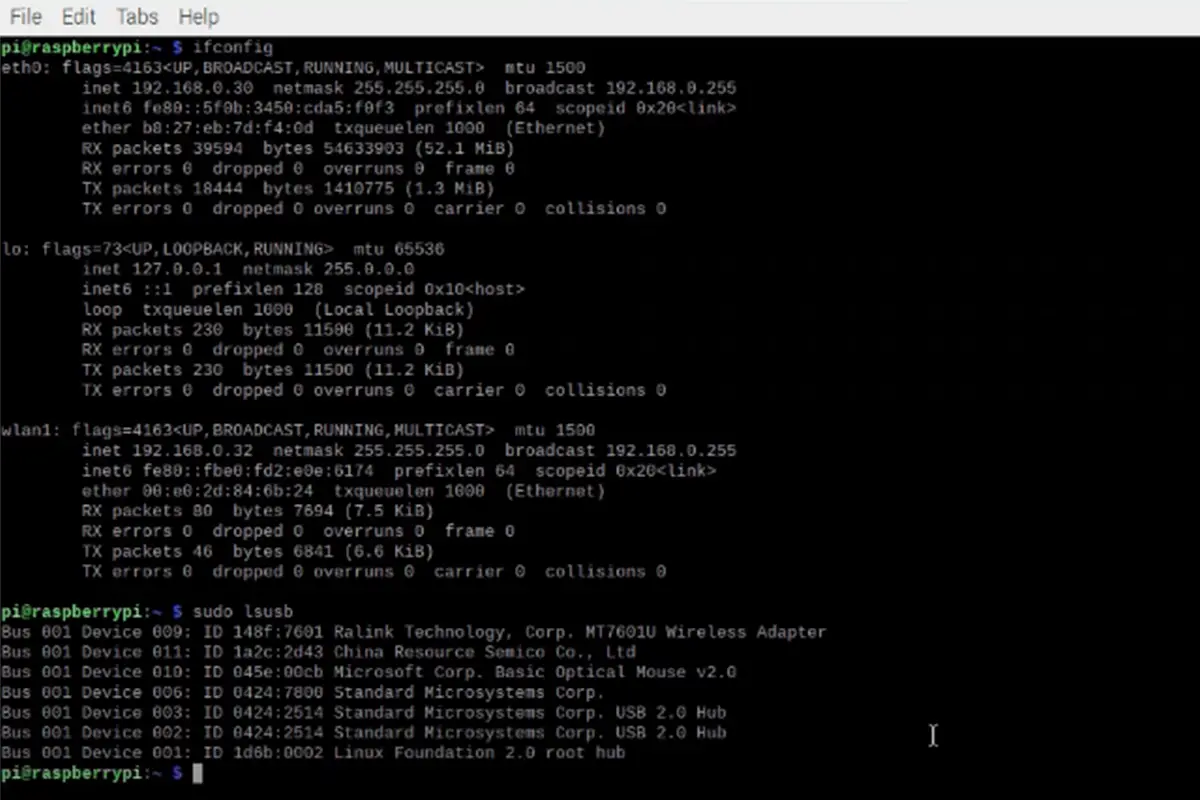
This first method is a headless setup, which means that you’re not going to need a monitor or any kind of display connected to your Raspberry Pi. This will work with an SD card that you want to get connected to the internet.
The only thing that you need to do here is create a Raspberry Pi WiFi setup wpa-supplicant file and then copy it over to the SD card.
No seriously, that is. This file holds the WiFi details and tells the Pi to connect automatically upon booting up.
So all you need to do is the following:
- Open a text editor (Notepad will do) on your computer and paste the following code:
country=IN
ctrl_interface=DIR=/var/run/wpa_supplicant GROUP=netdev
update_config=1
network={
ssid=”YOURSSID”
scan_ssid=1
psk=”YOURPASSWORD”
key_mgmt=WPA-PSK
}
-
You’ll need to replace YOURSSID with your WiFi network name and YOURPASSWORD with your own password, as well as the country code if you need to.
-
Then save the file with the name wpa_supplicant.conf – This name exactly, otherwise it won’t work.
-
Finally insert your SD card and copy the file over. Now your SD card will connect to WiFi automatically when booting.
Method Number Two – Welcome Wizard
The next two methods require a desktop, to bear that in mind. You will be able to set up your WiFi connect directly through the Welcome Wizard that comes as standard programming in the Raspberry Pi.
The welcome wizard should pop up the first time that you boot the computer after flashing the SD card, and after you’ve chosen your language and country, the next option will be setting up your WiFi. So long as your router is working, your WiFi network should appear on the list for you to connect to. Simple as that.
Method Number Three – Connecting From The Taskbar
If you missed the welcome wizard, or your Raspberry Pi has disconnected from WiFi and you need to set it up again, then it’s important to know that you can configure your WiFi connection from the taskbar. Again, this is a pretty simple process, but difficult to imagine if this is your first time.
- Click on the network symbol on the taskbar – it should be next to the clock.
- There should be a list of all of the WiFi networks available.
- Find your preferred network and enter the password.
- You should be connected after just a couple of seconds.
Method Number Four – Raspbian Lite
The Raspbian Lite setup is slightly more complicated, although the name suggests otherwise, and so you might need a little bit more help to figure out and configure your WiFi settings on this version. This and the next method will both be helpful for figuring out the WiFi connection with a Raspberry Pi Lite.
This first method involves using the raspi-config tool, which is very useful and available by default. This should help you configure everything with ease.
- Open the terminal and run the command: sudo raspi-config
- This should open up a screen that shows you a bunch of new options like changing your username or password, booting options, and, importantly, network options.
- Navigate to the network options panel, and then to WiFi.
- Here you will be prompted to enter your network name (SSID) and password.
- Exit the terminal
After this, your Raspberry Pi should be connected to the network and you’ll have internet access again.
Method Number Five – Manual Configuration
Once again, this method is for the Raspberry Pi Lite version. Please bear in mind that this connection configuration is a little tricky and more complicated than the others, adn this is because it is a way to use big networks that are going to require a more secure authentication.
The beginning of this method is going to look similar to what we did in the very first method, and that is because we had to create the same basic configuration that is used in other Raspberry Pi variations.
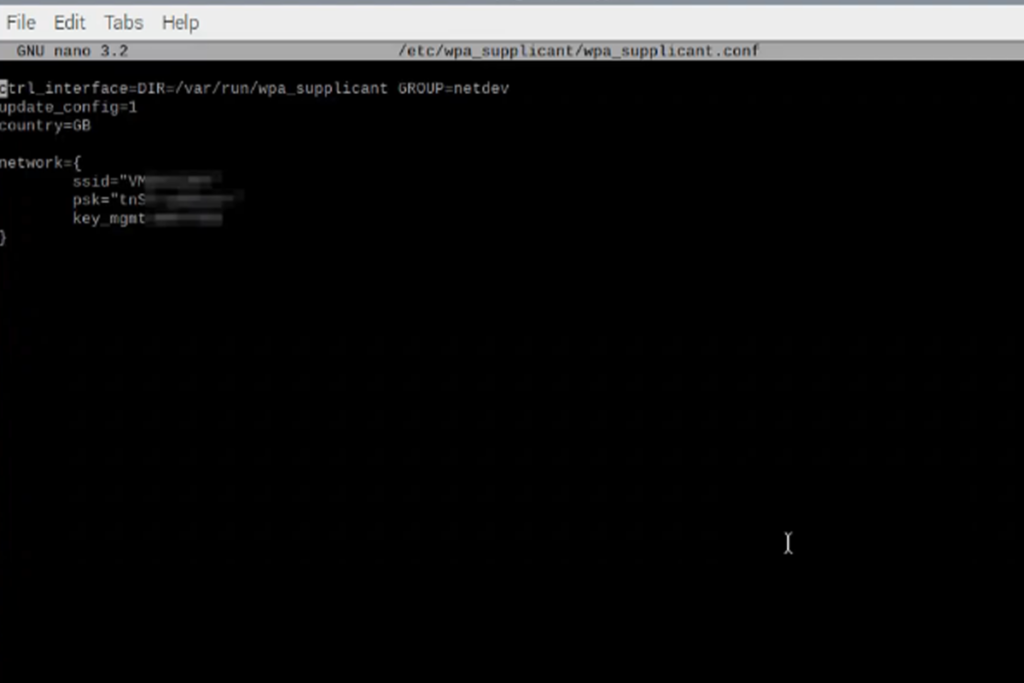
You need to edit the wpa_supplicant.conf file to use your desired configuration. This file will be available in the file path /etc/wpa_supplicant/. You will then need to use the Nano editor so that you can edit the supplicant file.
In order to get to the Nano editor, use the command:
Sudo nano /etc/wpa_supplicant/wpa_supplicant.conf
This command will open the file in a way that lets you edit it, so you just need to add your own network name and password and it should work for you.
If you’re wanting to see what else you can do to change or adapt the settings to add more security to your configuration then you can find some examples here.
If instead you want to set a static IP on your network then you can set that in the dhcpcd.conf file. This can be opened using the command:
Sudo nano /etc/dhcpcd.conf
Then you’ll need to scroll down and find the examples of static IP configuration lines, then you can uncomment every line that you need. This could possibly include routers, DNS, IP address, etc. With Nano you’ll be able to modify all the values to your own configuration and save them like that.
Finally all you need to do is reset the Pi so that all of the changes become active. The command that will reboot your system is this:
Sudo reboot
And then you’re done! You should be connected to the WiFi, and it should happen automatically the next time that you boot up.
Bottom Line
These methods should be foolproof ways to get you connected to the WiFi network, depending on your setup and system, one of these is bound to get you connected. If you’re still running into trouble, then there may be an issue with your router, or the hardware.
If you’re a real beginner, then you should consider sticking with the desktop methods so that you can see what you’re doing easily and have help via the welcome wizard – messing around with coding is what Raspberry Pi is trying to get you more comfortable with, but it doesn’t need to be the very first thing that you do upon getting started.
If you feel more comfortable with the Raspberry Pi then you can try to configure it using the SD card or editing with Nano, and if you still happen to run into problems then don’t worry, there are plenty of other forums that will help you figure out your issues and see what kind of a wall that you’re running in to.
My final little bit of advice is going to be to make sure that you create a backup for your SD card – maybe even multiple . If you’re messing around with the coding and something goes wrong, it’s going to be a lot easier to just reboot from a backup then try and start from scratch – believe me.