

There’s a lot of information out there on how to store data in Raspberry Pi, but not all of it is comprehensive.
This is why in this guide, we will walk you through everything you need to know about storing data in your Pi, the different methods you can use, and how to choose the right storage option for your needs.
So, let’s dive right in!
Does Raspberry Pi Have Storage?
First things first, if you’re new to SBCs (Single Board Computers), you may be wondering how to save data in Raspberry Pi and whether or not it even has inbuilt storage.
Unfortunately, the Raspberry Pi doesn’t have any onboard storage, which means you can’t store data directly on the board.
But don’t worry!
Even though it doesn’t have its own dedicated storage, the Raspberry Pi can still use external storage devices to save data. We’ll go over the different storage options you can use with your Pi later on in this guide.
Click Here For The Best Raspberry Pi Gear & Accessories!
How to Store Data on Raspberry Pi
Let’s move on to how to actually store data on the device.
As we’ve just mentioned, since the Pi doesn’t have any internal storage, you’ll need to use external storage solutions to save data on your Pi.
The most common external storage methods used with the Raspberry Pi are:
- SD cards
- USB flash drives
- External HDDs
- Cloud Storage
- NAS (Network Attached Storage)
Let’s take a closer look at each of these storage options:
1.) SD Cards
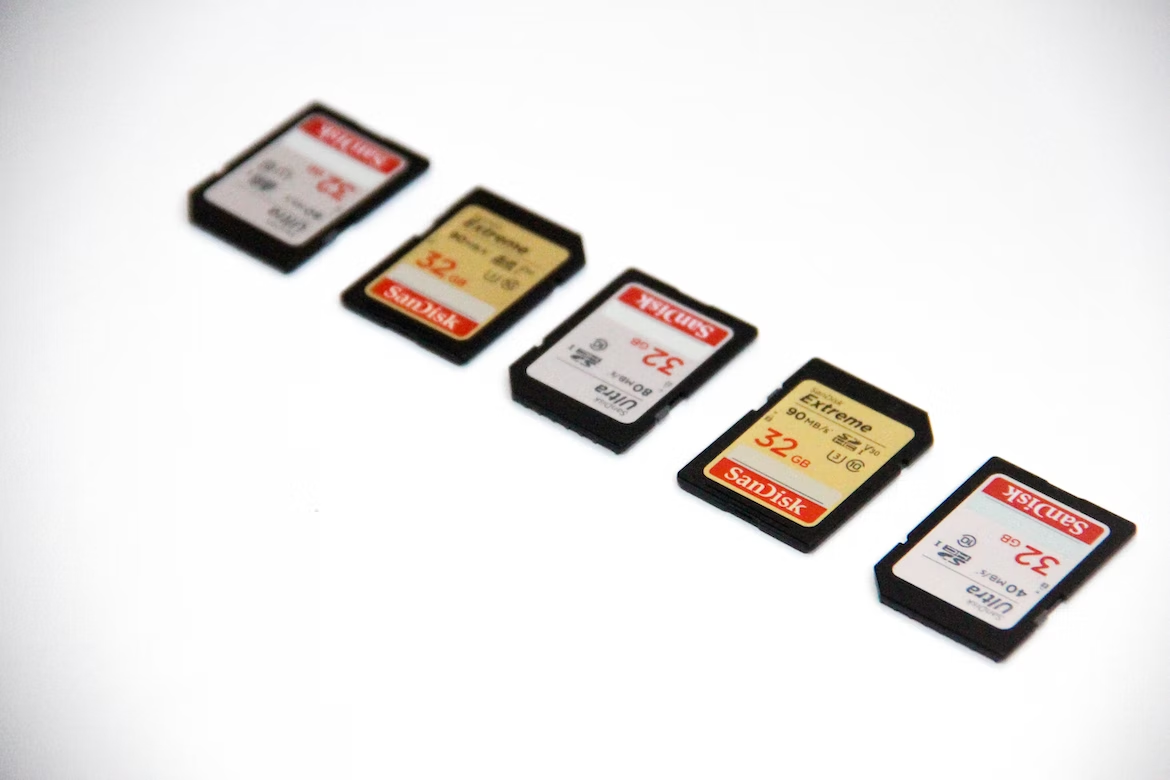
SD cards are one of the most popular storage solutions for Raspberry Pi (see also ‘Raspberry Pi Models Comparison: Which Pi is Right for My Application?’). They’re small, portable, and relatively inexpensive, which makes them perfect for use with the Pi.
In terms of capacity, standard SD cards can range from 2 GB to 32 GB. If you need more storage than that, you can also get SDXC cards that have storage capacities of up to 2 TB.
One thing to keep in mind with SD cards is that they’re not the most reliable storage option. They’re prone to corruption and data loss, so it’s important to make regular backups of your data if you’re using an SD card as your primary storage solution.
2.) USB Flash Drives

Another popular storage option for the Raspberry Pi is a USB flash drive. USB flash drives are larger and more expensive than SD cards, but they’re also much more reliable.
In terms of capacity, USB flash drives can range from a mere 8 GB all the way up to 1 TB. Some manufacturers also produce USB flash drives with a whopping 2 TB capacity!
One thing to keep in mind with USB flash drives is that they’re not as portable as SD cards. They’re larger and require a USB port to use, which means you can’t just take them with you on the go like you can with an SD card.
Plus, because they poke out from the side of the Pi, they can be more susceptible to damage and might not fit in a Pi case as snugly as an SD card would.
Click Here For The Best Raspberry Pi Gear & Accessories!
To save data in Raspberry Pi using a USB stick, just follow these steps:
- Connect the USB flash drive to your Raspberry Pi (see also ‘How To Connect Raspberry Pi To Laptop’).
- Format the USB flash drive using the FAT32, exFAT, or another Pi-supported file system (see also ‘What Is NFS?‘).
- Now, find out where the USB drive is mounted. If you’re going to use the Terminal, follow this tutorial, and if you’re going to use Python, try this guide instead.
- Finally, use Python or any app to collect data and store it in the USB drive.
Top Tip: Remember, formatting will erase all data already on the SD card, so be sure to back up anything you don’t want to lose!
Here’s a great video walkthrough on this method:
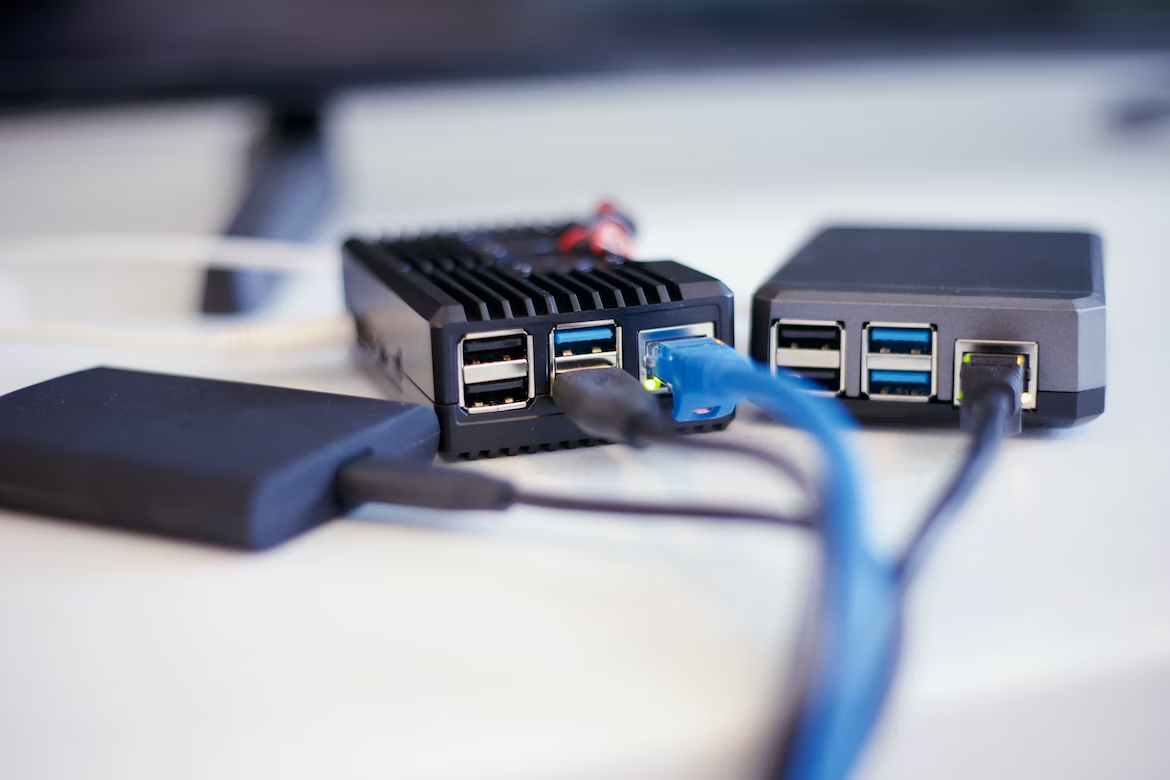
3.) External HDDs
If you need even more storage than what an SD card or a USB flash drive can provide, you can also use an external hard drive. These are especially useful if you intend on using your Pi as a NAS box or media server due to its huge storage boost.
External hard drives are larger and more expensive than both SD cards and USB flash drives, but they’re also the most reliable and expansive storage options.
In terms of capacity, external hard drives can range anywhere from 500 GB to a whopping 10 TB.
And the best part?
Most modern ones are usually a convenient case of just plug-and-use, especially if you’re using newer versions of the Pi. The external HDD should mount automatically and can be used to store data in your Raspberry Pi with little to no effort.
4.) Cloud Storage
If you don’t want to store your data on a physical storage device, you can also use cloud storage.
Cloud storage is a service that allows you to upload and store files on a remote server. This means you can access your files from anywhere in the world, as long as you have an internet connection.
There are a number of different cloud storage services to choose from, but some of the most popular ones are Microsoft Azure, Amazon AWS, and Seafile & Nextcloud.
Unfortunately, the biggest drawback of cloud storage is that it increases the power requirement of the Pi and also limits the Pi’s installation location (it can never be too far away from the WiFi).
To use cloud storage with your Raspberry Pi, you’ll need to:
- Sign-up for an account with a cloud storage provider.
- Set up the device to communicate with the server using the provider’s preferred method (usually via an HTTP API).
- Finally, connect to the server and start storing your Pi’s data in the cloud.
Click Here For The Best Raspberry Pi Gear & Accessories!
5.) NAS (Network Attached Storage)
The last option for storing data on your Raspberry Pi is to use a NAS (Network Attached Storage) device.
NAS devices are external hard drives that connect to your home network and can be accessed by any computer or mobile device on that network.
This makes them ideal for sharing large amounts of data between multiple devices or for backing up data from all your devices to a single location.
The only drawback is that NAS storage systems require a stable and reliable data connection 24/7. A temporary loss of connection while accessing files may lead to data being corrupted.
To use a NAS with your Raspberry Pi to store data as you would with any other file locally, you’ll need the following:
- A router with an Ethernet connection (wireless will work, but it’s usually much slower).
- An external hard drive or a dedicated NAS device connected to the router.
- The appropriate communication protocol for your Network Attached Storage installed on your Pi (usually this is SMB).
- The NAS is properly mounted into your device’s file system.
Here’s a complete guide on how to access your NAS drive on your Raspberry Pi.

The Takeaway: How to Store Data in Raspberry Pi
As you can see, there are a number of different ways that you can store data in Raspberry Pi (see also ‘How To Install Chrome On Raspberry Pi‘). Which method you ultimately choose will depend on your specific needs and requirements.
If you just need to store a small amount of data, then an SD card or USB flash drive will probably suffice.
But if you need more storage space, or if you need to share data with multiple devices, then you might want to consider using an external hard drive or NAS device.
And if you need to access your data from anywhere in the world, then cloud storage might be the best option for you.