
Klipper is a powerful 3D printer firmware that optimizes printing performance by offloading computational tasks to a separate device, such as a Raspberry Pi. While Klipper is highly efficient, its functionality is further enhanced when paired with a webcam. Why? A webcam allows you to monitor prints in real-time, troubleshoot issues early, and even create stunning time-lapse videos of your projects. This guide walks you through setting up a Klipper webcam for Raspberry Pi, ensuring seamless integration with your 3D printer.
1. The Role of a Webcam in 3D Printing
Integrating a webcam with Klipper is a game-changer for 3D printing enthusiasts. Let’s explore why this simple addition is so impactful:
Remote Monitoring
Whether you’re printing from your home office or managing multiple printers in a workshop, being able to monitor your 3D printer remotely is invaluable. Webcams allow you to check print progress without being tethered to the printer. This is particularly helpful for long prints that span several hours or even days.
Early Detection of Problems
A webcam serves as your eyes on the print bed. Issues such as layer shifting, nozzle clogs, or filament runouts can derail a print. By monitoring through a live stream, you can spot these problems early and intervene before significant time or material is wasted.
Time-Lapse Videos
A webcam enables you to capture mesmerizing time-lapse videos of your prints. These videos are not just fun to share but can also help you analyze print quality and settings. Some tools, like Crowsnest and Obico, even offer automated time-lapse features, simplifying the process further.
Click Here For The Best Raspberry Pi Gear & Accessories!
2. Choosing the Right Camera for Your Setup
The choice of webcam plays a critical role in the performance of your monitoring system. You’ll typically decide between USB webcams and Raspberry Pi cameras. Each has unique benefits and drawbacks.
USB Webcams
- Features: USB webcams are widely available and generally offer plug-and-play functionality. Many models support high-definition streaming, making them a popular choice.
- Advantages:
- Simple to set up with minimal technical know-how.
- Broad compatibility across different devices and software.
- Flexible mounting options for positioning.
- Disadvantages:
- Bulkier compared to Raspberry Pi cameras.
- May require additional configuration depending on the model.
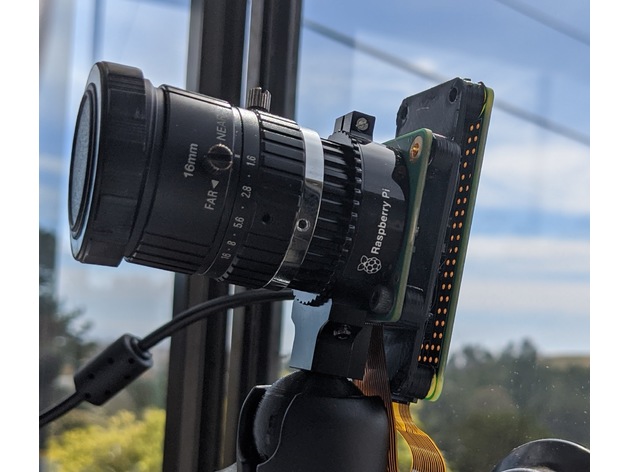
Raspberry Pi Cameras
- Features: Raspberry Pi cameras are designed specifically for use with Raspberry Pi boards, offering compact dimensions and high compatibility.
- Advantages:
- Lightweight and space-saving, ideal for custom setups.
- Direct integration with the Raspberry Pi’s hardware.
- Typically supports higher frame rates for smoother video.
- Disadvantages:
- Installation can be tricky for beginners.
- Higher cost compared to budget USB webcams.
Which Should You Choose?
If you prioritize simplicity, a USB webcam is your best bet. For those looking to save space and integrate seamlessly with the Raspberry Pi, a Pi camera is the better choice. Both options work well with Klipper, so it ultimately comes down to your specific needs.
3. Preparing Your Raspberry Pi for Camera Integration
Before diving into the installation, you’ll need to prepare your Raspberry Pi. This step ensures a smooth and hassle-free setup.
Hardware Requirements
- Raspberry Pi: A Model 3B or higher is recommended for optimal performance with Klipper.
- Camera: Your selected USB webcam or Raspberry Pi camera.
- Cables and Connectors: Ensure you have all necessary power and connection cables.
Software Setup
1. Update Your Raspberry Pi: Run the following commands to ensure your Raspberry Pi is up to date:
sudo apt update && sudo apt upgrade2. Klipper Installation: Ensure Klipper is installed and running on your Raspberry Pi. If you’re using Mainsail or Fluidd, verify they’re configured correctly.
3. Check Dependencies: Install any additional packages required for your camera:
sudo apt install v4l-utilsClick Here For The Best Raspberry Pi Gear & Accessories!
4. Installing and Configuring the Webcam
The setup process varies slightly depending on whether you’re using a USB webcam or a Raspberry Pi camera.
For USB Webcams
1. Physical Connection: Plug your USB webcam into one of the available USB ports on your Raspberry Pi.
2. Verify the Connection: Run the following command to check if the webcam is recognized:
ls /dev/video*You should see /dev/video0 or a similar output.
3. Configure in Mainsail/Fluidd: Open your printer interface and navigate to the webcam settings. Set the stream URL to:
http://:8080For Raspberry Pi Cameras
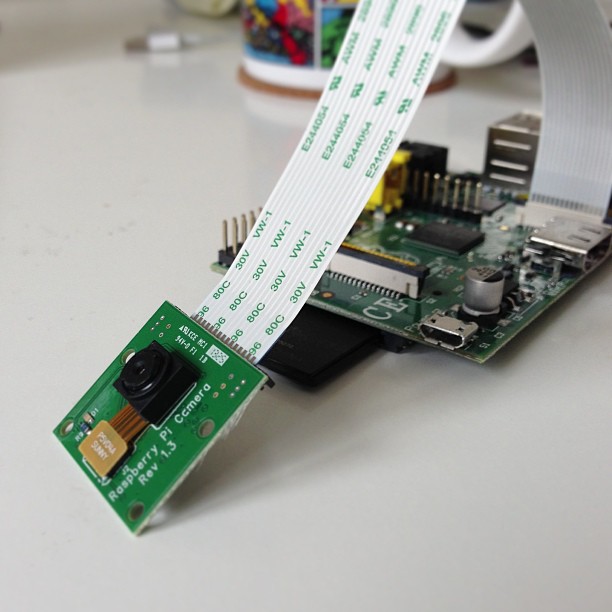
1. Hardware Installation: Connect the Pi camera to the CSI slot on your Raspberry Pi board.
2. Enable the Camera: Run sudo raspi-config, go to Interfacing Options, and enable the camera.
3. Configuration: As with USB webcams, configure the stream URL in your Mainsail or Fluidd interface.
5. Enhancing Functionality with Crowsnest
Crowsnest simplifies managing webcams in a Klipper setup, especially if you’re using multiple cameras.
Key Features of Crowsnest
- Supports multiple webcams.
- Provides advanced configuration options for resolution and frame rates.
- Ensures stable and optimized video streaming.
How to Set It Up
Install Crowsnest:
sudo apt install crowsnestConfigure camera settings in the crowsnest.conf file.
Restart the service:
sudo systemctl restart crowsnestClick Here For The Best Raspberry Pi Gear & Accessories!
6. Accessing Your Webcam Feed Remotely with Obico
Obico is a powerful tool for remotely monitoring your 3D printer. By integrating with Klipper, it allows you to view your webcam feed and control the printer from anywhere.
Steps to Integrate Obico
- Install the Obico client on your Raspberry Pi.
- Create an account on Obico’s platform and add your printer details.
- Test the webcam stream to ensure proper functionality.
Obico also offers advanced features like notifications for print status and failure alerts, making it a must-have for serious makers.
7. Troubleshooting Common Issues
Video Feed Not Working
- Double-check all physical connections.
- Ensure the webcam is properly recognized using
ls /dev/video*. - Restart your Raspberry Pi.
Stream Quality Issues
- Lower the resolution and frame rate in the camera settings.
- Ensure a stable network connection for smooth streaming.
Camera Not Detected
- Verify compatibility of your webcam model.
- Update your Raspberry Pi firmware.
8. Tips for Optimal Camera Performance
- Camera Placement: Position the camera to cover the entire print bed for maximum visibility.
- Lighting: Use adequate lighting to avoid dark or grainy streams.
- Optimize Settings: Adjust resolution and frame rates to balance quality with performance.
Click Here For The Best Raspberry Pi Gear & Accessories!
Final Thoughts
Adding a webcam to your Klipper setup on Raspberry Pi opens up a world of possibilities. From real-time monitoring to troubleshooting and creating time-lapse videos, it’s a small upgrade that delivers massive value. Follow this guide step-by-step, and you’ll be well on your way to an enhanced 3D printing experience. Ready to elevate your prints? Start setting up your webcam today!