
The Raspberry Pi – a tiny computer with endless possibilities – has been entertaining and educating hobbyists, students, and professionals alike.
But what if you could unlock even more potential with your Pi, and you could run multiple operating systems on it, each with its own unique environment and applications?
Although the Pi’s architecture is not natively supported by Virtualbox, we have a few tricks up our sleeve to make it happen.
With a little effort – and our step-by-step guide – you can transform your Pi into a virtualization powerhouse.
Click Here For The Best Raspberry Pi Gear & Accessories!
How To Install Virtualbox On Raspberry Pi
Before you do anything else, you should download and install the virtual box into your host computer. Click this site, and download the virtual box installer file.
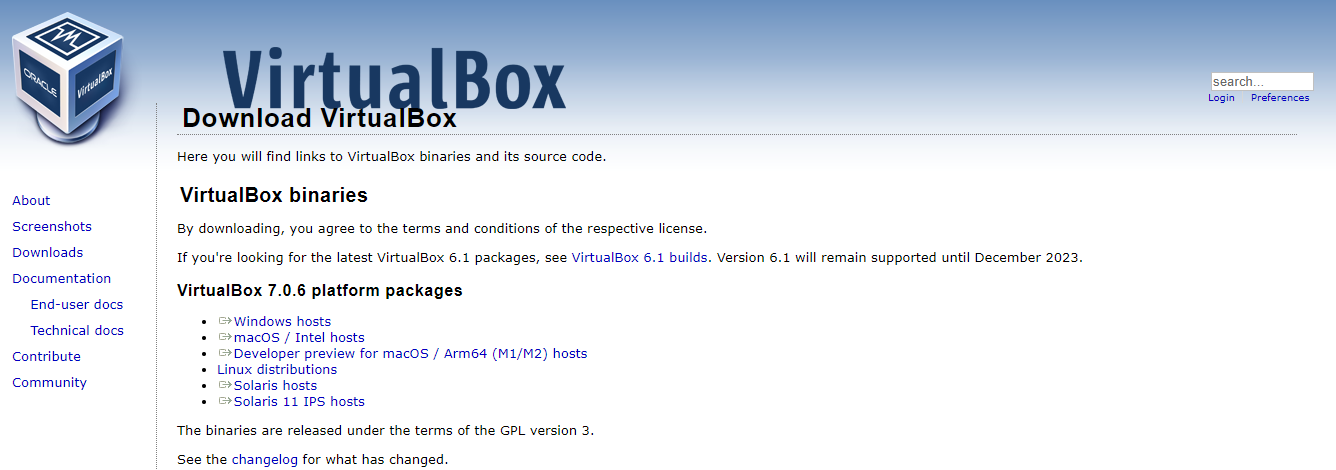
1. Visit Virtualbox Website
When you click the above link, it will direct you to the Virtualbox downloads page.
2. Click Window Hosts
On the site, find the “Virtualbox 7.0.6 platform packages”. After that, select the window hosts, which will prompt the virtualbox.exe file to begin downloading.

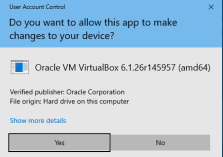
3 Set Up Wizard
Once you have clicked the installer option, you will see a prompt asking if you want to enable the app to modify your device. Select “yes,” and the wizard will proceed.
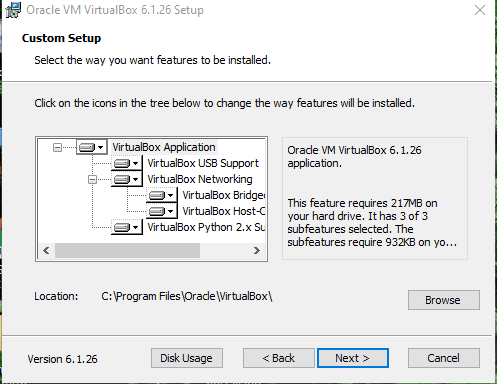
4. Custom Setup
The next step is to customize how you want the features to get installed.
Continue with the pre-set options by clicking “next.”
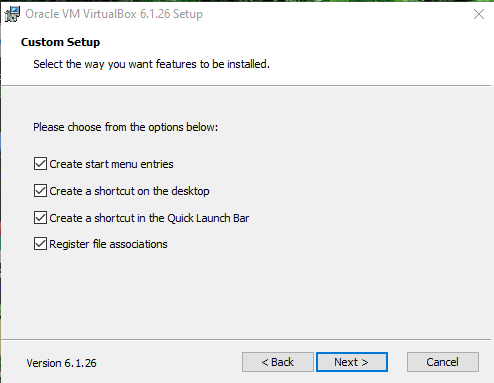
5. Continuing Custom Setup
At this stage, you can choose various options. Tick all of them.
6. Network Interfaces
The network interfaces feature allows you to install the Oracle VM Virtualbox 7.0.6 network module, and you will temporarily get disconnected from your network when you click “yes”.
But don’t worry – just proceed with “yes.”
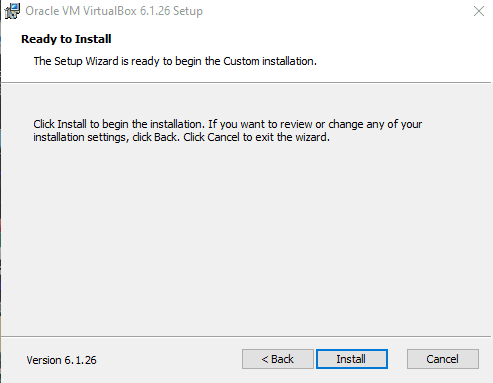
7. Ready to Install
Now, you can proceed with installation by clicking on “Install.”
- If you did wrong selections at some point, click “back” to review them
- If asked to allow changes on your device, select “yes.”
8. Finish the Installation
Click on the “finish” prompt. It will shut the installation window and activate the virtualbox.
Top Tip: Have the AMDs AMD-V enabled. They will allow the virtualization of operating systems like Raspberry Pi Desktop by Virtualbox. It’s essential to do this to get the most out of your hardware capabilities.
Click Here For The Best Raspberry Pi Gear & Accessories!
Setting Up Raspberry Pi Desktop on Virtualbox
1. Raspberry Pi Os Desktop ISO Download
First, visit the download page to start downloading. You can do that via Torrent download, but you must have installed torrent software on your device.
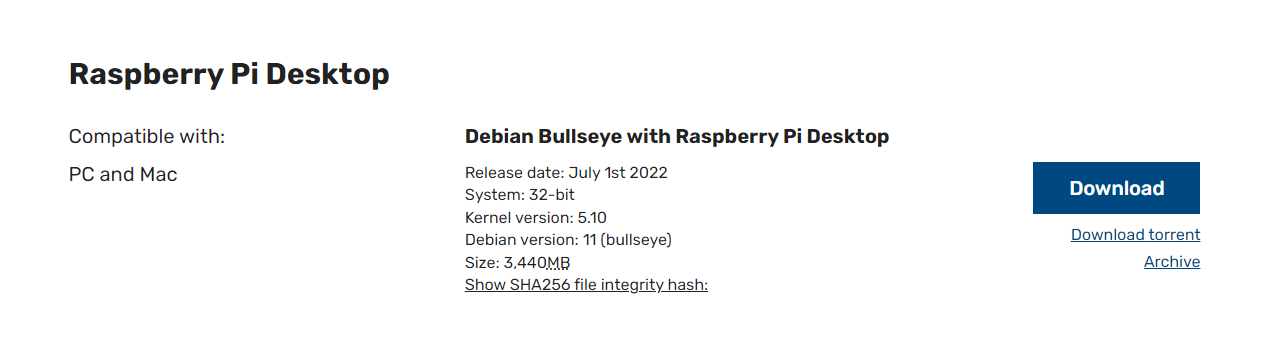
Note: The download might take longer because ISO files are larger than 2GB.
2. Set Up a New Virtual Machine
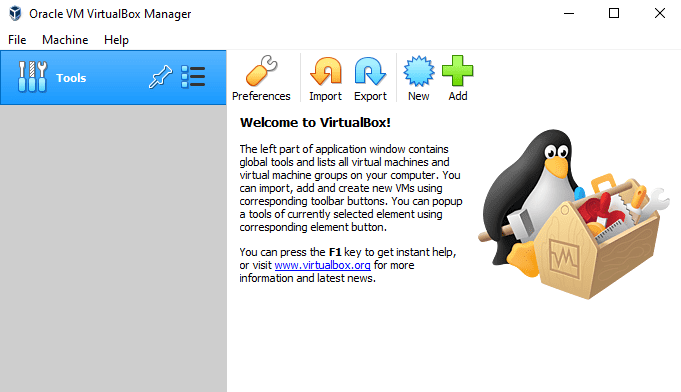
To begin, you will need to activate the virtualbox.
You’ll see any previous virtual machines you’ve created or, if you’re just starting out, an empty window. Don’t worry if you’ve just installed Virtualbox and can’t see the window – it’ll soon be visible, as shown below.
Press “CTRL+N.”
Once you do that, you will receive a setting pop-up on the virtual machine.
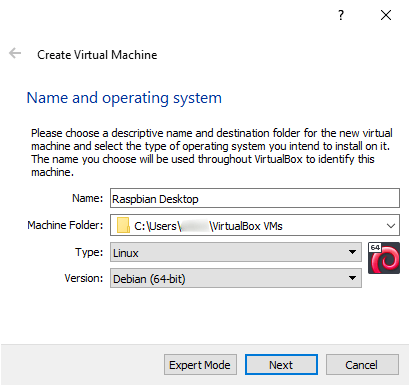
3. Creating a Virtual Machine Name and Type
You need to choose a name that you’ll easily remember.
Hint: Since you’re setting up a Raspberry Pi Os Desktop, you can call it a “Raspbian Desktop.”
Next, choose where you want the virtual machine to be stored. You can opt for Linux and, specifically, 64-bit Debian. After that, click “next,” as shown below.
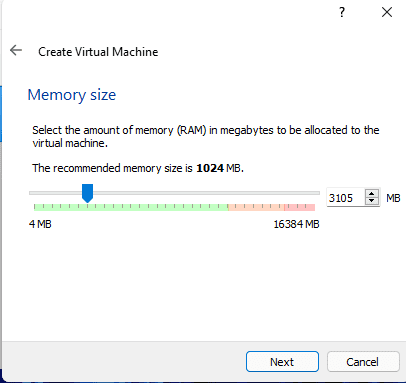
4. Allocate Random Access Memory[RAM]
-
The size of RAM you allocate to your virtual device is crucial in ensuring smooth performance.
-
The default memory size is 1GB or 1024MB.
-
You have the option to allocate more, as long as it stays within the recommended range.
-
This will prevent the virtual machine from consuming too many resources and leaving your host operating system without enough memory.
In this example, we’ve allocated a generous 4GB for optimal virtual device performance.
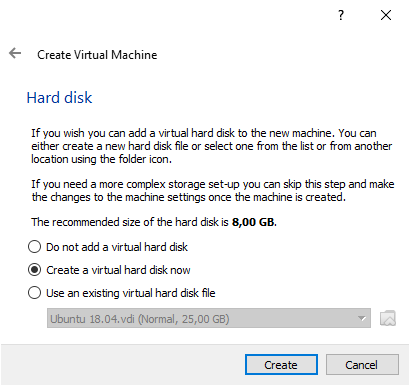
5. Virtual Hard Drive
A virtual hard drive stores the operating system and all virtual machine files. So, after selecting the size of your Random Access Memory, the VirtualBox machine will inquire if you intend to set up a virtual hard drive for your virtual device.
Go with the default instruction”Create a virtual hardisk now,” then click “create.”
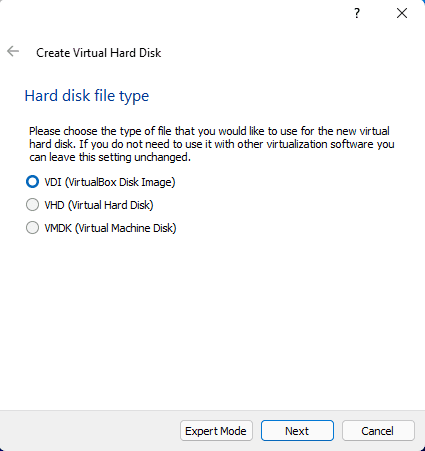
6. Type of Hard Disk File
If a Virtual box asks you the type of hard drive, use the default option –VDI (Virtual box Disk Image).
7. Virtual Hard Disk Storage
After choosing the type of hard disk you need, you will have to choose whether you prefer a dynamically allocated hard disk or one with a fixed size.
Which one should you choose?
We recommend you choose a “dynamically allocated” option if you have the space.
However, if you have adequate space on your machine with low performance, go with a fixed size.
The dynamically allocated disk can utilize more allocated resources when operating the VM. But if your computer has the grunt and the resources, you don’t have to worry.

8. File Location and Size
We’re nearly there!
-
At this point, you need to select the amount of space to be allocated to the VM. It may differ depending on the machine, but the default is 32GB.
-
Putting the size at 20 GB+ is not bad if you use the software for light purposes.
-
If you will use the software for heavy purposes, it’s wise to increase the size of the hard disk to meet your needs.
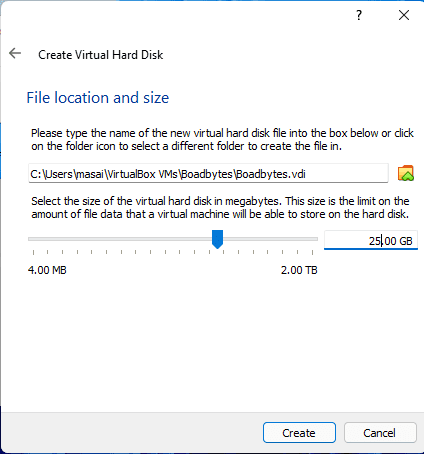
If you select “Create,” the virtual hard drive will be created, and close the pop up tab. Check your virtual list and spot a new virtual machine.

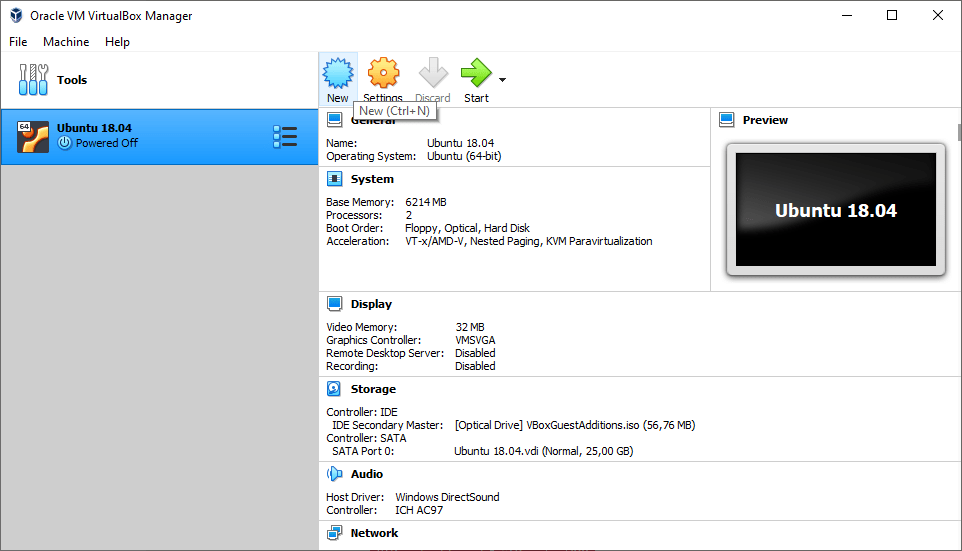
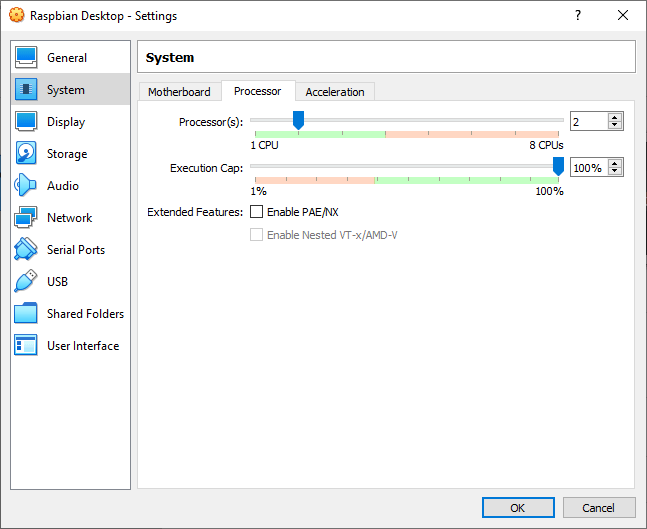
9. CPU Allocation
To make your VM better, select your “Raspbian desktop” and select settings. Alternatively, click right on the VM and then Settings.
Check on the “system tab” to see how many CPUs are available for your VM. Only one will get utilized.
Top Tip: If your machine has the core capability, use at least two to four cores. It will make things faster when running the VM.
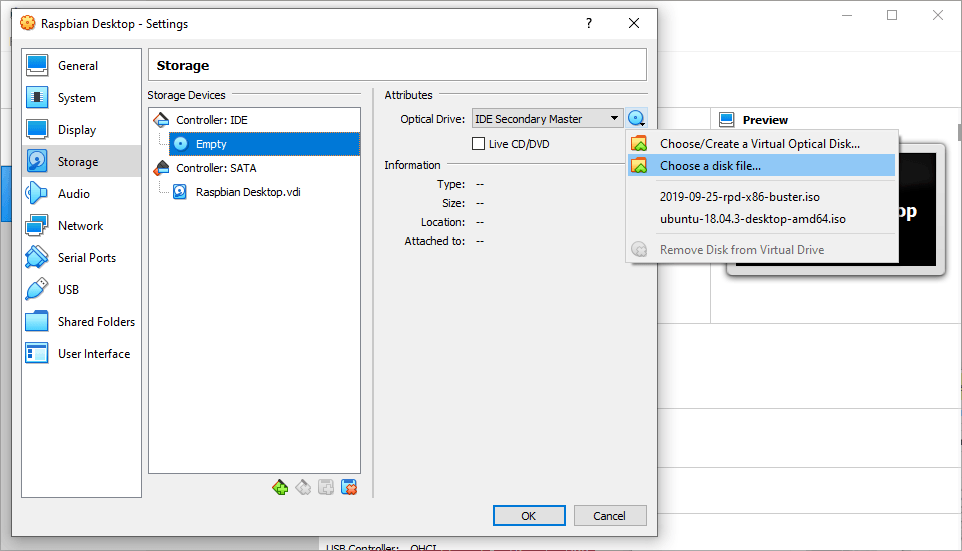
10. Link the Raspberry Desktop ISO file to Your Virtual Machine
Follow these steps:
- Move to “storage”
- Check Under controller: IDE, select the empty “Disk icon”
- Check on the right, select the disk icon
- Select “Choose file disk”
- Ensure the storage settings are set up with the file you downloaded
If you selected the file correctly, you’ll see it as shown:
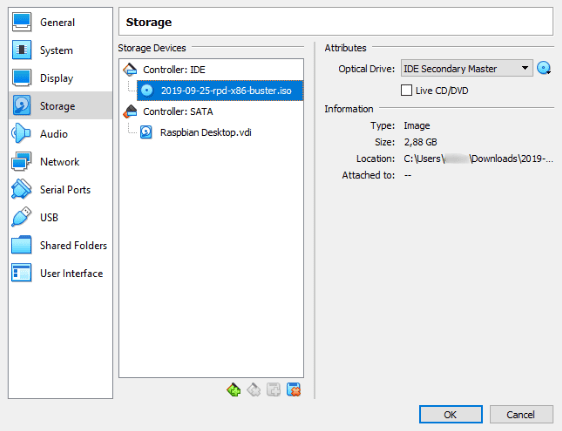
Then select “ok” to put the settings window off.
Click the start button to launch your Rasbian Desktop VM.

We made it!
You have now set up a virtual machine, allocated Random Access Memory and CPU, and linked the Raspberry Desktop ISO.

Final Thoughts
In conclusion, the process of installing Virtualbox on Raspberry Pi might seem complicated, but it is a worthwhile investment to unlock the full potential of the tiny computer.
With the right setup, you can run multiple operating systems on your Pi, each with its own unique environment and applications.
This opens up a world of possibilities for hobbyists, students, and professionals alike.
So, go ahead and start your virtualization journey with Raspberry Pi and Virtualbox!
If you want to know more about VirtualBox and Raspberry Pi, check out the below video from Robotics Back End. Give them a like and subscribe if you find it useful.