
![How To Install Magic Mirror On Your Raspberry Pi [Ultimate Guide]](https://raspians.com/wp-content/uploads/2023/12/rasp-featured-6.jpg)
As a Raspberry Pi enthusiast or electronic hobbyist, have you ever considered stepping into the realm of smart home technology in a unique and engaging way? The Magic Mirror project offers just that — a chance to turn your Raspberry Pi into a stunningly interactive and intelligent mirror. This innovative project not only enhances your daily routine with a blend of practical functionality but also adds a magical touch to your living space.
Exploring The Origins Of The Magic Mirror
The Magic Mirror, a brainchild of Michael Teeuw back in 2014, is a sterling example of how a simple idea can revolutionize the DIY tech community. It all started with a vision of a mirror that does more than reflect — one that offers timely information like weather updates, news, calendar events, and personalized messages. This concept rapidly caught the attention of tech enthusiasts and tinkerers worldwide, leading to a vibrant community of creators and an array of customized versions.
This guide is more than just a step-by-step manual; it’s a deep dive into the fusion of technology and design. By turning your Raspberry Pi into a Magic Mirror, you’re not just building a gadget; you’re joining a movement that redefines the boundaries of home technology and DIY innovation. Let’s embark on this exciting journey together, exploring the best methods to bring the magic of this project into your home.
Click Here For The Best Raspberry Pi Gear & Accessories!
Understanding Your Options For Magic Mirror Installation
Before we dive into the step-by-step process, it’s crucial to understand the various paths you can take to install the Magic Mirror on your Raspberry Pi. While there are several methods outlined in the official installation guide, each comes with its own set of pros and cons:
- Magic Mirror OS: This approach seems straightforward — simply flash it onto your Raspberry Pi, and you’re good to go. However, I find it’s not the best option for reasons we’ll explore.
- Docker Image: Docker is renowned for its ability to compartmentalize services in secure containers, safeguarding both the application and your system. But is it the right fit for the Magic Mirror? We’ll discuss.
- Random Installation Scripts: These are the seemingly easy, one-click installation methods. They might be tempting, but they often leave you with little control over what gets installed on your device.
Each of these methods might appear to offer a hassle-free installation, but they often lead to more complex maintenance issues down the line. If your goal is merely to test the Magic Mirror on a specific Raspberry Pi model or screen, choosing the Magic Mirror OS image could be a quick solution. Just flash it to your SD card, and it should work without a hitch.
However, if you’re aiming for the most effective and sustainable setup for your Magic Mirror, one that will stand the test of time and offer you both stability and flexibility, stay tuned. Our comprehensive guide is designed to walk you through the best method for a long-lasting and enjoyable Magic Mirror experience on your Raspberry Pi. Let’s get started on this magical journey!
Magic Mirror Installation
Here are the steps required to install Magic Mirror on your Raspberry Pi.
Download and install NodeJS
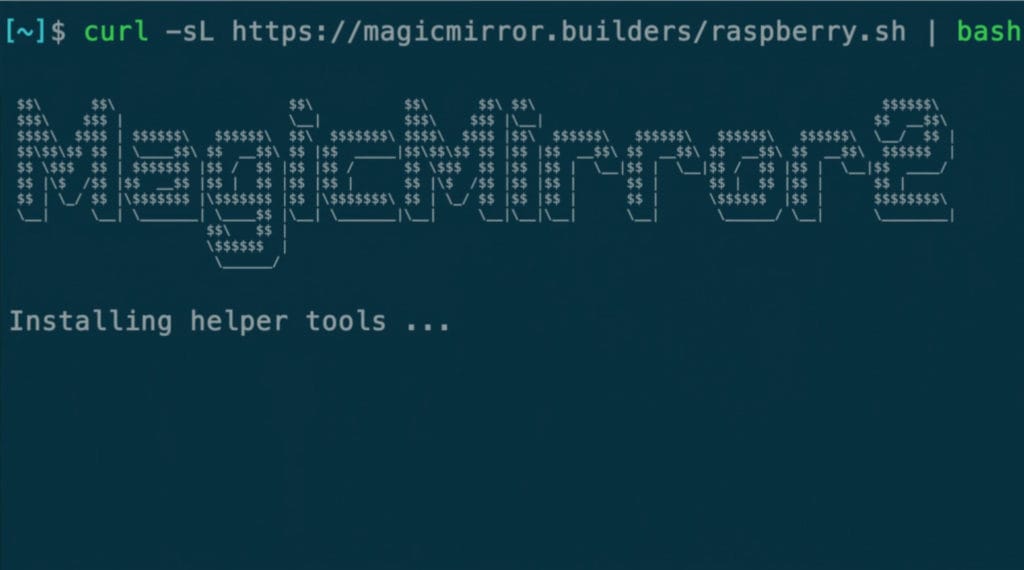
curl -sL
https://deb.nodesource.com/setup_14.x |
sudo -E bash -
sudo apt install -y nodejs
At the time of writing, NodeJS 17 was available, but the official guide still use the version 14. I haven’t tested with the latest version, but feel free to try it if you experience issues on the following steps. I have a guide about Node.js on Raspberry Pi if you want to know more about this cool language.
Clone the GitHub Repository
This will download the magic mirror source code on your Raspberry Pi (or some of the Raspberry Pi alternatives).
git clone
https://github.com/MichMich/MagicMirror
cd MagicMirror
Install the application with:
npm installCopy the sample config file (This will get explained in the next section):
cp config/config.js.sample
config/config.js
Finally, start the application:
npm run startYou should now see the default Magic Mirror display on your screen. It will show you the time, date, weather and news. In the next section, we will go through how to configure and customize the display.
Click Here For The Best Raspberry Pi Gear & Accessories!
Magic Mirror Configuration Guide
Important note on closing the Magic Mirror app: By default, Magic Mirror opens in full-screen, and there is no exit button. To exit the screen, press “ALT” on your keyboard, then File>Quit. Of course, you could just press “CTRL+Q”.
How the Magic Mirror configuration works
The Magic Mirror configuration is the one you created during the installation. The file location is probably something like: “/home/pi/MagicMirror/config/config.js”. Open it with your favorite editor (nano for example), and take a look at the file content.
The structure of the configuration file:
The top of the configuration file includes the general variables for your installation: IP address, port, language and locale, time format, etc. These settings will be used by all widgets on your screen, so take the time to change them if needed. For example, you can set “timeformat” to 12 if you prefer and change the language to “fr”, “de” or whatever you prefer.
Then there is a big block with all the widgets listed. Widgets are named “modules” in the Magic Mirror configuration:
Most modules have a name and a position set. For example, on this screenshot, we can see that by default there is a “clock” module set to be displayed on the top left of the screen.
Some modules included in your configuration have only the position parameter set to tell where to display it on the screen, but others have many more options, like the calendar one, that will fetch a URL to download the next holidays.
Example: Changing The News Feed
The news feed sits at the bottom of the screen, and by default, pulls the latest articles from the New York Times, and displays them on your home page. If you were say, more interested in Raspberry Pi tips and tricks, you can customize your newsfeed to show you the latest articles from your favorite website (this one).
Open the config file in your favorite editor:
nano
/home/pi/MagicMirror/config/config.js
Find the newsfeed module:
module: "newsfeed",
position: "bottom_bar",
config: [
              {
                              title: "New York Times"
                              url: "https://rss.nytimes.com
               }
               ]
And replace it with something like this:
module: "newsfeed",
position: "bottom_bar",
config: [
              {
                              title: "Raspians"
                              url: "https://raspians.com
               }
               ]
Restart your Magic Mirror:
cd /home/pi/MagicMirror
npm run start
Now you will have something much more useful on your home screen!
Click Here For The Best Raspberry Pi Gear & Accessories!
How To Fix The Weather Widget On Your Magic Mirror
Magic Mirror comes with a weather widget enabled on the top right of your screen, the only problem? It doesn’t work.
If your weather widget just shows “loading” all the time, this is how you fix it.
- Go to OpenWeatherMap and create an account.
- Once logged in, click on “API keys” and generate a new API key for your Magic Mirror project.
- You’ll get a random string of characters. Copy it.
- Open the configuration file and find this part:
module: "weather"
position" "top_right"
config: {
                weatherProvider: "openweathermap"
                type: "current"
                location: "New York"
                locationID: "5128581"
                apikey: "YOUR OPEN WEATHER API KEY"
}

module: "weather"
position" "top_right"
config: {
                weatherProvider: "openweathermap"
                type: "forecast"
                location: "New York"
                locationID: "5128581"
                apikey: "YOUR OPEN WEATHER API KEY"
}- Put your API key in both locations. The first one is for the current weather, the second for the weather forecast.
- Restart your Magic Mirror application to apply the changes
The weather for New York should now be displayed. To change the weather to another location, change the two fields “location” & “locationID” in both modules. The values to set can be found by downloading this file.
This file has all the cities in the world, so it is smart to do this process in the terminal or via SSH:
Download the file onto the Raspberry Pi:
wget
https://bulk.openweathermap.org/sample/city.list.json.gz
Extract the file:
gunzip city.list.json.gzUse grep to quickly find the corresponding ID:
grep "Austin" -B! -A2
city.list.json
Pick the ID that corresponds to your city and set them as the values in the configuration file. Once you restart your Magic Mirror, it should show the updated weather information for your chosen location.
How To Change Widget Positions On Your Magic Mirror
You might have noticed, that each module is set to be displayed in a specific location in the configuration file. To change a widgets position just change the location to one of the following:
- top_bar and bottom_bar: full width top and bottom of the screen.
- top_left, top_center and top_right : just under the top bar, with three columns.
- bottom_left, bottom_center and bottom_right: just above the bottom bar, with three columns.
- upper_third, middle_center and lower_third: they are the three regions in the middle of the screen
Click Here For The Best Raspberry Pi Gear & Accessories!
How To Auto-Start Magic Mirror
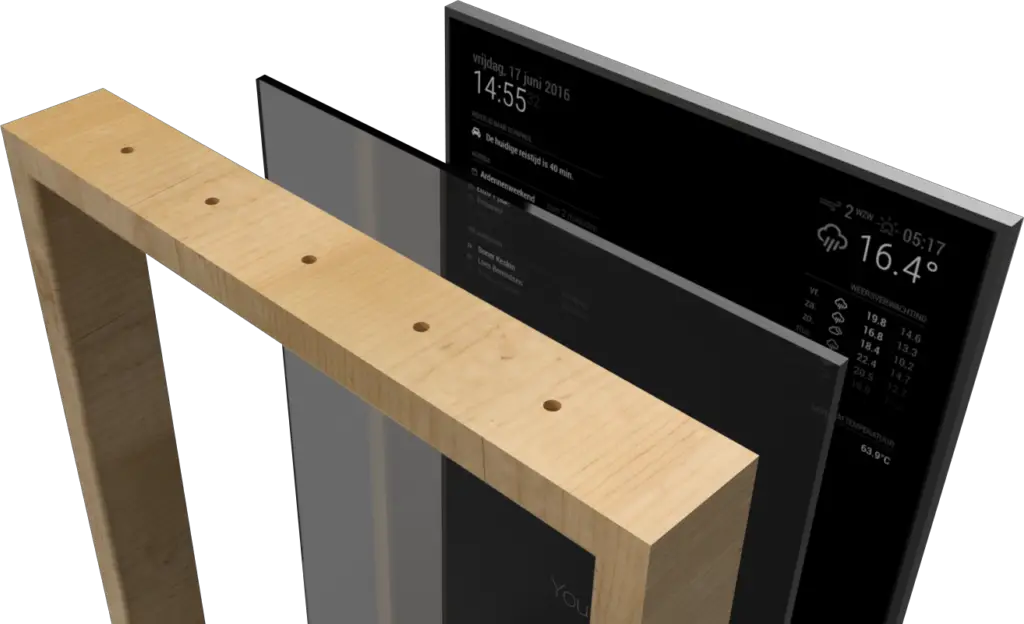
If you intend to use your Magic Mirror as a stand-alone device, you would probably need it to start automatically when the Raspberry Pi starts up. This is especially useful if you enclose your Magic Mirror in a wooden frame with two-way glass.
To do this, the easiest way I found is to use pm2. PM2 is a process manager for NodeJS application. It’s a bit like the systemd or service commands you may be used to on Linux, but for NodeJS processes. Here is how to use it:
Install PM2 with the command:
sudo npm install -g pm2Set PM2 to autostart on boot:
pm2 startupCreate a script to start the Magic Mirror app:
nano /home/pi/mm.sh
Paste these lines in this file:
cd ./MagicMirror DISPLAY=:0 npm start
Save and exit (CTRL+X)
Add the execution permission:
chmod+x mm.sh
Start the Magic Mirror with PM2:
pm2 start mm.sh
Once started, save the current state with:
pm2 save
By doing this, it will automatically start it on boot.
Once done, you’ll now use PM2 to manage the Magic Mirror app. You get access to handy commands like:
- Restart Magic Mirror (after any configuration change):
pm2 restart mm - Close the application:
pm2 stop mmIt will be “start” to restart it after that:
pm2 start mm.sh - Show the recent Magic Mirror logs:
pm2 logs mm
This is really useful to troubleshoot any error or if the screen doesn’t show up anymore after a configuration change.
Installing new modules on your Magic Mirror setup
All of this is already pretty nice, you have a neat dashboard with the date/time, calendar, weather and news feed. But it’s only the beginning.
Click Here For The Best Raspberry Pi Gear & Accessories!
Introducing Magic Mirror modules
The Magic Mirror is a modular app, where you can download and install new widgets from the community. Most of them are listed here, but you can also find modules from random developers on GitHub there and there. It includes things like:
- Displaying jokes.
- Cryptocurrencies and stocks values in real time.
- Displaying the weekly timetables for students.
- Connecting to most open APIs like Google apps, transport companies or weather services.
Anything you might need is probably already available as a module for your dashboard. And if not, you can create your modules with a bit of JavaScript.
Magic Mirror modules manager
It’s possible to download and install each module separately, by acceding the GitHub project for each of them, reading the documentation and following the configuration steps. But I find it a bit complicated, and as a modules manager exist, I think it’s a good idea to try to use it first.
The modules manager is named “mmpm” and can be installed on your Raspberry Pi by following these steps:
- Install the prerequisites:
sudo apt install libffi-dev nginx-full -y - Then the package itself:
python3 -m pip install --upgrade --no-cache-dir mmpm - Run the installer:
mmpm --guided-setupIt will ask you several questions about you current installation and how you plan to use the modules manager. There is no wrong answer. Follow the wizard and answer everything (most questions are answered with “yes” or “no”). - Finally, run this command to add the mmpm command to your shell:
echo 'export PATH="$PATH:$HOME/.local/bin"' >> ~/.bashrc
You need to restart the terminal (or reconnect your SSH session) to use the commands I give just after.
Once done, you can use this tool with the following commands. It close to aptAPT, or Advanced Package Tool, is a software utility used to manage the installation, removal,… so you shouldn’t be lost with this:
- mmpm search : A search engine to find corresponding modules (like apt search).
mmp search calendar - mmpm list: List all packages. Options are available to filter this list, use –help to see them.
mmpm list -a #List all mmpm list --help #Show the help mmpm list -i #List installed modules - mmpm install : Install a new package.
mmpm install random_quotes - mmpm -h: Get more help about this tool.
How to install a new Magic Mirror module with mmpm
To make sure everything is clear, let’s take an example. Let’s say you want to display an inspirational quote on your Magic Mirror screen. Here are the easy steps to follow to do it:
-
Search the name of a module doing this:
mmpm search quotes -
There are two results available, let’s take the random_quotes module:
mmpm install random_quotes -
Once done, the only thing to do is to edit your configuration files, and add these lines in the “modules” section:
{ module: "random_quotes", position: "bottom_bar" }, -
Restart the Magic Mirror with:
pm2 restart mm
That’s it, you’ll now get a random quote at the bottom of your screen.
Most modules will have additional options you can add. For example, with this one you can set what kind of quotes you want to see (success, inspirational, motivation, etc.). You need to check the module documentation to know all the details.