
How do you back up a Raspberry Pi?
This is an often asked question, but unfortunately there are no simple answers. In this article we will cover three different methods for backing up the Raspberry Pi.
Why Back Up Your Raspberry Pi?
The reason why we back up our Raspberry Pi is because we don’t know what could happen to it.
The worst thing that could happen is losing everything stored in your SD card. So, we always keep a backup just in case something happens to our Raspberry Pi.
What Can Go Wrong Without Backups?
If your Raspberry Pi crashes or gets damaged somehow, then all of your data on your SD card will be lost.
If you have any important files on your SD card, then you should definitely back them up before doing anything else with your Raspberry Pi.

Method 1: Copy The SD Card Image
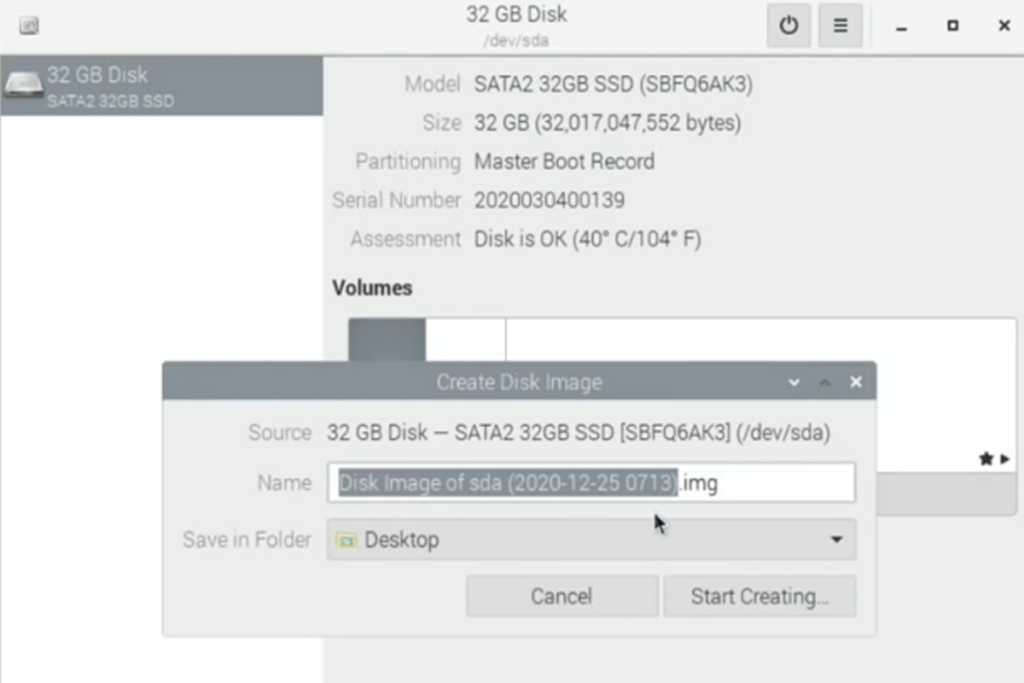
This is the simplest method to back up Raspberry Pi SD cards. This method involves copying all the files on the SD card into a single image file. In this case, we are creating a backup of the entire SD card.
This is exactly the reverse of flashing an OS onto the SD card. Flashing an OS essentially just unzips all the OS files and reconfigures them to work on your Pi.
But here, you are packing all the data from the SD card into a simple image file that can be easily restored when needed. This is how exactly operating system images are created in the first instance.
First, you’ll need to power down your Raspberry Pi. Do this by typing:
sudo shutdown now
This shouldn’t take more than 10 seconds. Once it’s powered off, take out the power cable from the Raspberry Pi. This is to make sure that no power is going through any components while we’re taking the SD card out.
It’s a safety precaution – and it’s always best to be safe!
Now, remove the SD card from the Raspberry Pi. Next, connect the SD card reader to your computer. If you don’t have a card reader built into your computer or laptop, you can use a USB-to-SD adapter.
Once connected, insert the SD card into the SD card reader. Your computer should automatically detect the new SD card. Now, click on “Open” in the bottom right corner of your screen.
You’ll need to know the location on your computer that represents the SD card you just plugged in. Typically, this will be in the /dev/ folder on both Mac and Linux. In Windows, the SD card will show as a drive in File Explorer – select “This PC” in the pane on the left.
On Mac or Linux, open a terminal and enter this command:
df
This will show you a list of the drives and partitions on your computer. Find the SD card.
On Linux, the command to image the disk is as follows:
sudo dd bs=4M if=/dev/sda of=raspbian.img
Replace /dev/sda with the location of your SD card.
On Mac, the command is:
sudo dd bs=4m if=/dev/rdisk2 of=raspbian.img
Again, replace /dev/rdisk2 with the location of your SD card.
This is all you need to do on Mac and Linux to create an image file of your Raspian OS.
You can use this as a backup, and restore the OS completely with it in the future. You’ll be able to restore the OS to exactly the same state that it was in when you backed it up.
Backing Up The Raspberry Pi On Windows Using Win32 Disk Imager
If you’re on Windows, You’ll need to use a program called Win32 Disk Imager that is often used to write the initial OS image to your Raspberry Pi SD card.
Once you’ve downloaded and installed it, simply choose the SD card that you want to back up from the menu in the top right. Enter a name and location for the backup, and click “Read”. The program will make the backup for you in the location that you chose!
You can also restore files from any image file created by this tool. To load the SD card, open the folder where you saved the image file. Select the image file and press Open.
This will start the process of restoring the contents of the SD card.
Method 2: Zip The Home Directory
You can also back up your Raspberry Pi without removing your SD card. We will take the backup of the home folder as a compressed file. Decompressing this file lets us browse and restore every file/directory.
For this use the terminal and run this command:
cd /home
This will make sure that you’re in the home directory. Next, enter this:
sudo tar czf pi-home.tar.gz p1
This will create a file called pi-home.tar and you can copy this to a USB drive or any other device for safekeeping. If you wish to back up your Raspberry Pi while keeping it running, this is one of the best ways.
Method 3: Scheduled Backups
It is possible to schedule backups automatically using cron jobs. To do this, you must run the tar command as a scheduled task.
You can also back up using rsync and Déjà Dup, but these programs require manual intervention.
You can easily back up files and folders using Déjà Dup. It’s easy to install and use.
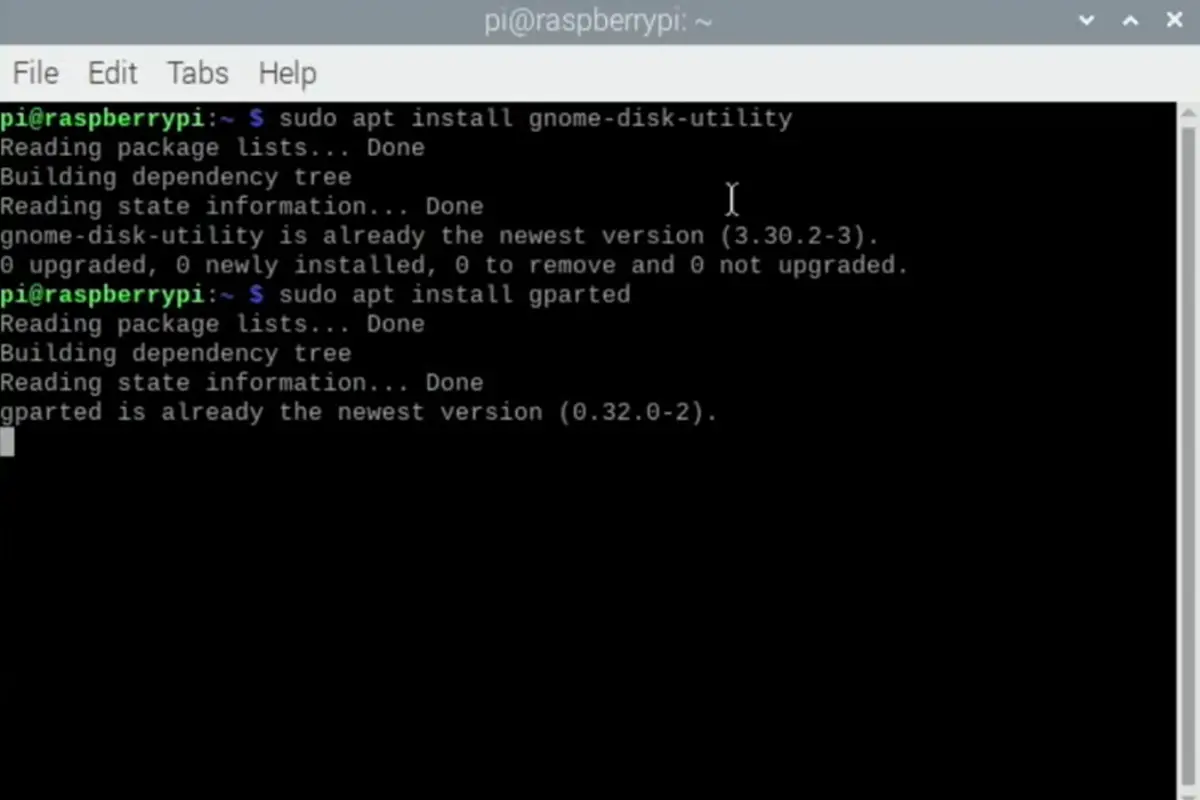
If you don’t have Déjà Dup installed, you can install it by running :
sudo apt update
And then:
sudo apt upgrade
This will make sure that your system packages are up-to-date before installing Deja Dup. Now, run this:
sudo apt install deja-dup
This will download and install Deja Dup for you automatically. Once it’s installed, you’ll find a Backups option in your menu. It’ll be in Menu > Accessories.
Open it up! Select what you want to back up, where to save them, and when a scheduled backup should be performed.
Go back to Overview and click Backup Now. Déjá Dup will start the first full backup of your Home folder, including hidden files. You’ll be asked about the encryption password. This is good for security.
Enter the password in the two fields. Click Continue. Your first backup may take some time, depending on how big your Home folder is. When Déjá Dup finishes successfully, you can set a schedule. Change the Off button to On and select Day as the day type.
Backup will automatically back up all of your Home directory to an external storage device every day – or based on whatever schedule you chose. You can restore any lost data by choosing Restore from the menu.
Restoration of files to their original locations means restoring them to their original places. You can choose to restore files to their originals or restore them to a specific folder.
You need to enter a password if you choose to restore files to their original locations. Click forward and continue. When all the files are restored, you will see “restore finished”. Click close. Now you will find all the files and folders from your home folder reinstalled.
Other Ways To Make And Restore Backups Of Your Raspberry Pi
There are many ways to make backups of your Raspberry Pi. We’ll go over three of the most common ones below.
Using A USB Hard Drive
The easiest way to back up your Raspberry Pi is by using a USB hard drive. The benefit of using a USB hard drive is that it can be plugged into any computer or device that has a USB port.
It also means that if something goes wrong with the Raspberry Pi, you can simply plug in another one and continue working as normal.
You can simply copy any important files over to your USB drive or stick. This is really easy for most people, but you won’t be able to back up your entire system so easily. You’ll have to use other methods.
Using Raspi-Config
You can use the raspi-config tool to create a backup of your SD card.
To access it, open the terminal and type sudo raspi-config. Then scroll down to “SD Card” and select “Create image””. After creating the backup, exit out of raspi-config by pressing Ctrl+X.
Using Etcher
Etcher is a way to restore an image of your Raspberry Pi. It’s a free app available from Google Play Store. Once downloaded, launch the application and connect your Raspberry Pi to your computer via USB cable.
Select the device where you want to install the OS and click “Flash!” to begin flashing the OS onto the SD card. When the process has completed successfully, disconnect the USB cable and power off your Raspberry Pi. Now simply insert the SD card into your Raspberry Pi and turn it on. The Raspberry Pi will boot up with the new OS.
Using Rsync To Back Up A Raspberry Pi
Rsync is a command line utility used to synchronize files between computers. There are several options to use when backing up your Raspberry Pi.
One option is to use rsync to sync only certain directories. Another option is to use rsyncd to run the backup job at night. Let’s look at each method in more detail.
Syncing Only Certain Directories With Rsyncd
To sync only certain directories, you must know which directories you’d like to include in the backup. For example, let’s say we wanted to back up our /home/pi directory. We could do this by running the following command:
rsync -avz –delete /home/pi/ /media/backup/
This would perform a full backup of the /home/pi directory and delete anything that was deleted since the last time the backup ran.
If you don’t want to delete everything, then add the –exclude flag after the path to exclude certain directories. For example, if you wanted to exclude the /boot/ directory, you would run:
rsync –exclude/boot/ -avz /home/pi/
Running Backup Automatically At Night Using Rsyncd
Another option is to automate the backup process. If you’re not sure how often you should run the backup, you may want to set up a cronjob to automatically run the backup every day at midnight.
To do this, first download rsyncd, which is a daemon that runs in the background. Next, edit the file /etc/default/rsyncd and change the value RUN_DAEMONyes to RUN_DAEMON”no”. Finally, restart the service by typing sudo service rsyncd start.
Now, whenever you want to run the backup, just type sudo rsync -avz /home /media/backup/. Remember to replace “/home” with whatever folder you want backed up.
How Often Should I Back Up My Raspberry Pi?
This is entirely up to you, but you should probably keep at least one backup per month. That way, if anything goes wrong, you won’t lose any important files.
Depending on your needs, you might need to back up more often than this. Some people need daily backups – and some even hourly!
What About Security?
The last thing we’d like to mention is that you should always secure your Raspberry Pi. There are several things you can do to protect yourself against hackers.
First, only allow SSH connections from trusted IP addresses. Second, change the default login credentials so they aren’t easily guessable. Third, enable root login only if absolutely necessary. Finally, disable remote logins altogether.
What If My Backup Gets Corrupted?
If this happens, you can try using ddrescue to recover the damaged part of the file. Simply run the command sudo ddrescue /dev/sda1 ~/backup_file.ddrescue.
In this example, sda1 would be the partition containing your backup file. Replace the path with the actual location of your backup file. There are no guarantees, however – so hopefully, you won’t be relying on just a single backup file!
How Many Copies Of Backups Do I Need?
That depends on how much data you have stored in your Raspberry Pi. If you’re storing large amounts of data, then you may need to store multiple copies of the same backup. This is because when you restore a backup, you don’t necessarily get everything back.
For instance, if you were to restore a copy of a backup made today, there’s a chance that you wouldn’t get the latest version of a particular file. So, if you’re backing up a lot of data, you may want to consider making multiple backups
Conclusion
That’s all there is to it! Hopefully, now you understand how to back up your Raspberry Pi using one of these methods (see also ‘Raspberry Pi WiFi Setup: Here are 5 Methods for Raspbian‘).
We recommend backing up your Raspberry Pi at least once a month. Also, we suggest you use multiple methods of backup so that you can recover your data even if only one method fails.