
This project is ideal for anyone looking to create a media server that is accessible to every person in a household. You can even configure it for access outside your local network.
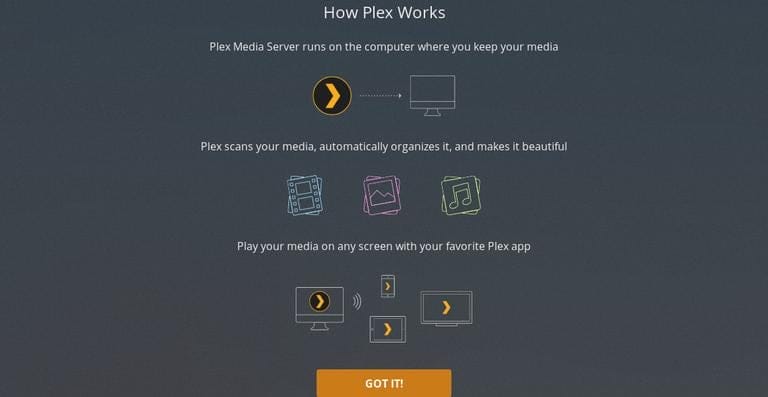
Plex operates on a client-server model, where the client streams data directly from the Plex media server. This setup allows you to store all your movies, music, and photos on one device, the server, which in this case is the Raspberry Pi.
Multiple clients can connect to the same server, eliminating the need for multiple copies of the same media on different devices.
The Plex client is compatible with a wide range of devices, including Windows, Apple, Android, Amazon Fire TV, Chromecast, Xbox, PlayStation, Linux, and many more, making it an excellent solution for home media.
If you’re interested in a single-client setup without a server, you might want to explore the Raspberry Pi Kodi media center instead.
For a completely free alternative to a media server, consider checking out Jellyfin.
You Might Like: The Ultimate Guide To Using The Linux “Find” Command
What You’ll Need
To complete this tutorial on setting up a Raspberry Pi Plex server, you’ll need the following:
Required:
- Raspberry Pi 2 or newer
- Micro SD Card
- Power Supply
- Ethernet Cable (Recommended) or Wi-Fi
Optional:
- Raspberry Pi Case
- USB Keyboard
- USB Mouse
- External Hard Drive or USB Drive (For storing movies, music, & photos)
Note: This setup will not work on older versions of the Raspberry Pi. A Raspberry Pi 2 or later is required.
Click Here For The Best Raspberry Pi Gear & Accessories!

Setting up the Raspberry Pi for Plex Server
In this guide, we’ll be setting up the Raspberry Pi Plex Server using Raspbian. If you haven’t installed Raspbian yet, check out our guide on setting up Raspbian. For a lightweight version, consider installing Raspbian Lite.
Preparing your Raspberry Pi for Plex
- Before installing Plex Media Server on the Raspberry Pi, ensure your OS is fully updated with the following commands:
sudo apt-get update
sudo apt-get upgrade- Next, we need to add the official Plex package repository to the Raspberry Pi. But before that, the
apt-transport-httpspackage must be installed to allow theaptpackage manager to retrieve packages over thehttpsprotocol, which Plex uses. Install the package with this command:
sudo apt-get install apt-transport-https- Now, let’s add the Plex repository key to the
aptkeyrings directory. This key ensures that the files you download are indeed from that repository and signed by that key. Execute the following command to download and save the key:
curl https://downloads.plex.tv/plex-keys/PlexSign.key | gpg --dearmor | sudo tee /usr/share/keyrings/plex-archive-keyring.gpg >/dev/null- With the Plex GPG key added, we can now append the official Plex repository to the sources list using the command below. Notice that we reference the keyring downloaded in the previous step.
echo deb [signed-by=/usr/share/keyrings/plex-archive-keyring.gpg] https://downloads.plex.tv/repo/deb public main | sudo tee /etc/apt/sources.list.d/plexmediaserver.list- Having added a new repository, it’s necessary to run the
updatecommand again to refresh the package list:
sudo apt-get updateIf you encounter the error /usr/lib/apt/methods/https could not be found, it indicates that the https transport package hasn’t been installed correctly. Double-check its installation.
Click Here For The Best Raspberry Pi Gear & Accessories!
Installing Plex on Your Raspberry Pi
- With the Raspberry Pi prepared to access Plex’s official package repositories, we can proceed to install the Plex Media Server package. Execute the following command to install the
plexmediaserverpackage:
sudo apt install plexmediaserver- The Plex installation process will automatically set up a few components:
- A dedicated user and group named
plexfor running the Plex service. - A directory for temporary file storage during transcoding, located at
/var/lib/plexmediaserver/tmp_transcoding. - A directory for storing media metadata, found at
/var/lib/plexmediaserver/Library/Application Support.
- Since Plex runs under a different user than the Raspberry Pi’s default
piuser, ensure that the permissions on your storage device are correctly set. If you’re using an external drive with Plex, refer to our guide on mounting a USB drive in Raspbian for assistance.
Configuring a Static IP Address for Your Plex Server
- To ensure consistent access to your Plex server, it’s advisable to use a static IP address. Retrieve your current IP address with the command:
hostname -I- Open the
cmdline.txtfile for editing:
sudo nano /boot/cmdline.txt- At the end of this file, add the following line, replacing
YOUR IPwith the IP address obtained earlier:
ip=YOUR IP- Save and exit the file by pressing
CTRL + X, thenY, and finallyEnter. - Restart your Raspberry Pi to apply the changes:
sudo reboot- Your Pi should now always start with the same IP address. Alternatively, you can configure your router to assign a static IP to your Pi based on its MAC address.
With these steps, your Raspberry Pi Plex media server should be fully set up and ready to stream media to any connected client.
You Might Like: Finding Files On Ubuntu Using The Terminal
Storing Media on the Raspberry Pi
There are several options for storing media on your Raspberry Pi:
- External Hard Drive: Connect an external hard drive with your media files. Ensure that Plex is set to run as the
piuser to access the drive without issues. - Permanent Drive Mounting: Mount drives permanently for continuous access. Refer to our guide on mounting a USB hard drive to the Raspberry Pi, ensuring the drive’s user and group ownership is set to
pi. - Network Attached Storage (NAS): Set up your Pi as a NAS for easy media transfer without disconnecting and reconnecting a hard drive. Follow our tutorial on setting up a Raspberry Pi network attached storage.
- SD Card: Although limited by space, you can use the SD card for storage and set up a network-accessible folder on it.
Connecting Devices to the Plex Media Server on the Raspberry Pi
The Plex client app on various devices such as smartphones, computers, Xbox, PlayStation, and others should automatically detect the Plex server on your Raspberry Pi.
However, it’s important to note that the official mobile Plex apps require a purchase for full feature access, while most other apps, including the web app, are free with only a select few features needing a subscription.
To access Plex through a web browser, enter your Raspberry Pi’s IP address followed by the port 32400 and /web/. For example:
192.168.1.100:32400/web/Upon accessing the URL, you’ll be prompted to log in. You can sign up for a new account or sign in to an existing one. You can bypass this step by re-entering the URL.
Click Here For The Best Raspberry Pi Gear & Accessories!
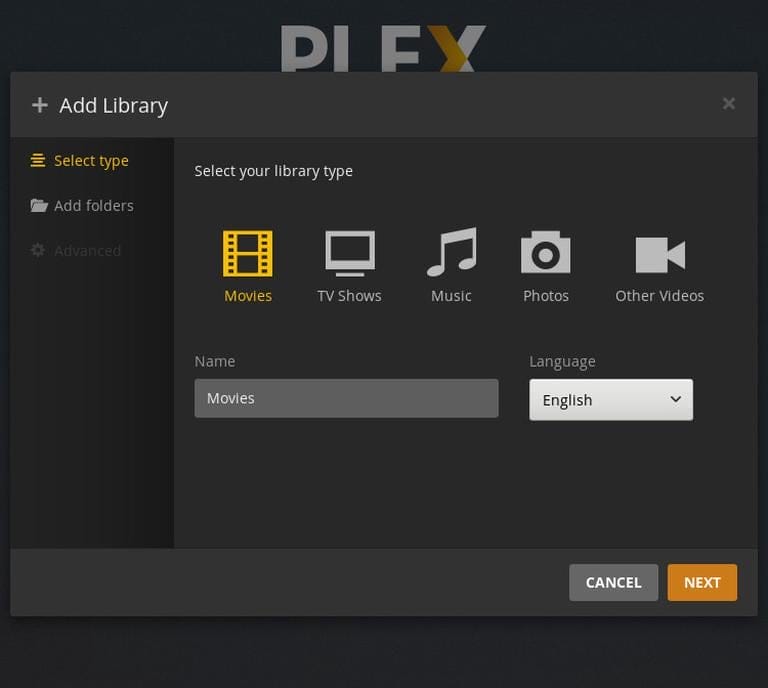
Setting Up Libraries in Plex
The process of setting up your music, movie, and TV show libraries in Plex is straightforward:
- Click on “Add Library” in the left-hand column.
- Choose the type of media contained in the folder. If you have multiple types, you’ll need to create a new library for each.
- Select the folder where your media is stored. For example, if it’s on a USB drive, it might appear in the left-hand column or at a path like
/media/pi/ESD-USB. - After adding the library, Plex will organize your media into an easily browsable interface.
For detailed guidance on setting up, naming, and organizing your media library, Plex provides extensive documentation on media naming and organization.
You Might Like: 30 Raspberry Pi Commands You Need To Know
Resolving File Permission Issues in Plex
A common issue with Plex on the Raspberry Pi is file access permission errors. This section will demonstrate how to modify permissions for an ext4 drive.
For NTFS or FAT formatted drives, you may need to remount the drive with adjusted mounting options, as these filesystems don’t support the Linux permission system.
- Determine the location of the drive or folder for which you want to adjust permissions. For example, an ext4 drive mounted at
/mnt/pimounteddisk/. - Switch to superuser mode with the command:
sudo su- Use the following commands to adjust permissions, replacing
[YOURDRIVEPATH]with your drive’s path:
find [YOURDRIVEPATH] -type d -exec chmod 755 {} \;
   find [YOURDRIVEPATH] -type f -exec chmod 644 {} \;
The first command sets read, write, and execute permissions for the owner and read and execute permissions for others on directories. The second command sets read and write permissions for the owner and read permissions for others on files.
- Exit superuser mode with the command:
exit- You should now be able to access your media files within Plex successfully.
You’re all done!
By following these steps, your Plex Media Server on the Raspberry Pi should be fully operational. If you encounter any issues or have feedback, feel free to leave a comment below.
The crew at Byte My Bits have put together a great video guide on the Plex media server. Check it out below