Audio devices are incredibly useful. These devices allow users to record and play audio signals using their Raspberry Pi computer.
These audio devices can take numerous forms, external microphones, electronic keyboards, headphones, or of course, speakers.
By using the right devices in combination with your Raspberry Pi you can process audio in numerous ways. Continue reading to find out how this works!
How To Connect Audio Input Devices
There are a few different options for inputting audio with your Raspberry Pi, such as using an external sound card, USB connection, or Bluetooth. This will allow you to attach devices that are capable of inputting audio to your Raspberry Pi.
USB Input
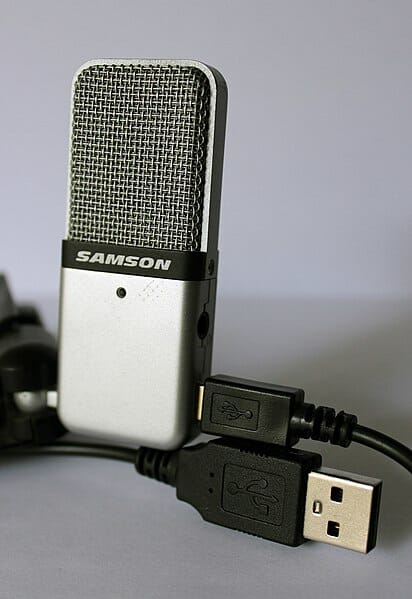
There are lots of USB microphones that are capable of attaching to your Raspberry Pi, if you’re on a budget check out the Behringer Bigfoot Studio Microphone or if you’re looking to go a bit more professional – the Shure MV7 is a great pick.
These USB microphones are probably the best way of inputting audio with your Raspberry Pi, as they are less prone to technological problems.
Not to mention, it’s super simple to set up and you won’t need any additional equipment. This can seriously save you time, effort, and money.
To attach your USB microphone to your Raspberry Pi, you first need to locate the USB port. Then, simply plug the microphone’s USB cable into the port. It’s as simple as that!
Though you can pretty much use any USB microphone, you may want to spend more money on a high-quality model if you desire high audio quality.
Bluetooth Inputs

Next, Bluetooth is a handy way to input audio. Bluetooth devices work by sending electronic radio waves.
This short-range technology means that your Raspberry Pi won’t have to be directly next to the audio device. This is not only seamless but it can be more convenient than attaching a microphone via a cable.
Though it’s important to consider that some Bluetooth microphones may be more expensive than those that connect via a USB cable.
It’s also worth noting that the audio quality can be inconsistent when using a Bluetooth microphone. Therefore, you may want to research products before you buy one.
Sound Card

You may be wondering what a sound card is. Well, these external cards can be used for inputting and outputting audio signals, hence the name.
You can then attach all sorts of different input devices to the sound card to make this method successful. The connection is often provided via an RCA plug.
One of the best models that you can use is the Wolfson Audio Card. This sensational sound card delivers high-definition (HD) audio and contains two DMIC microphones.
How Do You Output Audio With Raspberry Pi?
As with inputting audio, the Raspberry Pi is able to output audio. As you can imagine, speakers are the most practical way of outputting audio.
If you are using your Raspberry Pi as a media center and want to play your favorite tracks (click here to find out how to use qBittorent to find music), you will need at least some basic speakers. Luckily you have a few options.
Here’s how you can connect your Raspberry Pi to speakers:
USB Speakers
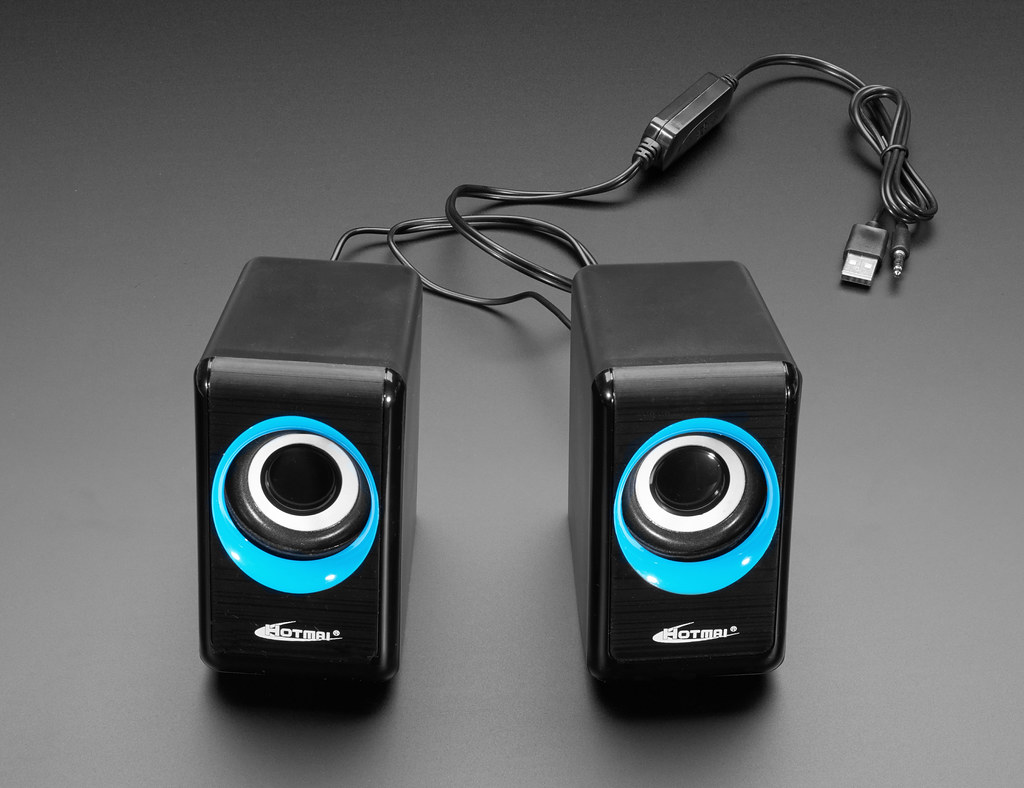
Your Raspberry Pi will come with a handy USB port, which is the perfect way to connect your USB speakers to the computer. In fact, some models are even built with multiple USB ports.
To connect your USB speakers to one of these ports, simply attach the cable to the port. It’s as simple as that. You can then begin outputting music or audio with your Raspberry Pi.
Bluetooth Speakers

Bluetooth speakers are great to use with your Raspberry Pi, as you won’t have to rely on wires. As a result, you are free to place the speakers and Raspberry Pi wherever you desire.
So if you want to connect your Bluetooth speakers to a Raspberry Pi to play some epic music, all you have to do is:
Connecting Bluetooth Speakers To A Raspberry Pi
Turn your speakers on. Of course, the method of doing this will differ depending on what speakers you are using.
Ensure that pairing mode is enabled on the speakers. This will allow two devices to connect via Bluetooth and so is essential for this task.
On your screen, locate the Bluetooth button. This is normally found toward the top of the screen. The Bluetooth button is usually represented by the infamous Bluetooth icon.
From the menu, click “add device.” You will then be met with a list of the various devices that you can connect to. From this list, find the name of your speakers.
Click on the name, if your speaker has not been given a unique name, it will instead have a code. Often, this code is featured somewhere on the device, which should make it easier to identify.
After clicking on the correct device, click pair. This will cause your speakers to become connected to the Raspberry Pi. You will be notified when the connection has been made.
You can now begin playing audio through your speakers. Just remember to control the volume beforehand, as the audio will not play otherwise.

Final Thoughts
Using your Raspberry Pi to input and output audio can be lots of fun! Hopefully, this extensive guide will have given you all the information that you need to know about inputting audio with your Raspberry Pi.
So now that you have all the information, why not experiment with inputting and outputting audio with this versatile device?!
Frequently Asked Questions
Can A Raspberry Pi Record Audio?
Yes, you can use your Raspberry Pi to record audio. Just bear in mind that you will need to use a microphone to achieve this.
Perhaps the best option for recording audio is a USB microphone, which can be connected to your Raspberry Pi via the USB port.
Can You Connect Headphones To A Raspberry Pi?
If you want to listen to your favorite song or a funny video, you can easily connect your headphones to a Raspberry Pi. This is because more recent models have been built with headphone jacks.
However, if you have wireless headphones, it will be a little more complicated. Luckily, you can connect them to your Raspberry Pi by enabling Bluetooth.
- How To Uninstall Packages On Ubuntu - March 13, 2024
- How To Restart Ubuntu Using The Terminal - March 13, 2024
- What Is The Steam Deck | Experience Modern Handheld Gaming - March 12, 2024


![How To Host A Website On A Raspberry Pi: A Step By Step Guide How To Host Your Own Website On Raspberry Pi [Ultimate Guide]](https://raspians.com/wp-content/uploads/2023/02/How-To-Host-Your-Own-Website-On-Raspberry-Pi-Ultimate-Guide-1-150x150.jpg)


Hello Erik, I am wanting to build a portable Raspberry Pi audio player and want to know all of the software needed in order to use VLC media player. As you can tell from my question this would be my first venture with a Raspberry Pi. I will have movies, music, audiobooks, short stories and Old Time Radio programs. Any and all help would be greatly appreciated.
Thanks in advance,
Ken
Hi Ken, I’d love to help you get started with your Raspberry Pi audio player project – it sounds like an exciting venture, especially as your first dive into the Raspberry Pi world! VLC media player is a fantastic choice for this, given its versatility with different media formats. You’re setting yourself up for a system that can play just about anything from movies and music to audiobooks and those nostalgic Radio programs.
You’ll need a Raspberry Pi, and while any recent model will do, the Raspberry Pi 4 (or 5) with a bit more RAM (think 4GB or 8GB) will give you smoother video playback. Grab a high-speed SD card (16GB is the bare minimum, but I’d recommend 32GB or more) for the operating system and your media files. Don’t forget a reliable power supply, a display (a small touchscreen for portability or an HDMI display works), and some form of audio output – speakers or headphones are key (you should also look into the various DACs available for the Pi, they improve the sound immensely),
You’ll start with installing Raspberry Pi OS on your SD card; the Raspberry Pi Imager tool is super handy for this. Once you’ve got the OS up and running, installing VLC is as simple as opening a terminal and typing:
sudo apt update
sudo apt install vlc
This gets VLC ready to play all your media.
If you’ve got your files on a USB drive or an external HDD, you can easily plug it in and play directly from there. Or, if you’re a bit more tech-savvy and have a network-attached storage (NAS), you can stream from your network too.
VLC is pretty flexible – you can dive into your media using its graphical interface or get fancy with command-line commands. And if you’re setting this up as part of a home entertainment system, why not explore controlling VLC remotely? There’s a web interface and even smartphone apps that can turn your phone into a remote control.
If you’re keen on having VLC ready to go as soon as you power on your Raspberry Pi, you can script it to auto-start. Imagine turning on your Raspberry Pi and having it immediately ready to play your favorite playlist or radio show.
Diving into a project like this is a fantastic way to learn, and the Raspberry Pi and VLC communities are incredibly supportive. There’s a wealth of documentation out there, from hardware setup to VLC’s advanced features. And if you hit a snag, forums and community groups are great places to seek advice.
Let us know how you go!