
GUI development for Raspberry Pi can be a daunting task. With so many different platforms and programming languages to choose from, you might be wondering; “Where do I start?”
Fortunately for you, in this guide, we’ll go through all the basics and explain how to develop GUI for Raspberry Pi, as well as some tips on how to get started.
So, let’s begin!
What Is A GUI?
Before we start talking about how to develop a GUI for the Raspberry Pi, it’s important to first define what a GUI is.
A GUI, or graphical user interface, is a kind of interface that lets users control their devices in a graphical way, typically through icons and visual indicators such as windows, menus, images, sliders, and buttons.
In simple words, in these interfaces, users understand the icons and widgets on the interface while the computer knows the commands associated with them.
And it’s no secret that we’ve grown accustomed to using highly responsive smartphone and desktop user interfaces. However, as you’ll find out below, developing GUI applications for Raspberry Pi or other embedded platforms requires you to go through several steps.
Click Here For The Best Raspberry Pi Gear & Accessories!
How to Develop GUI for Raspberry Pi?
Now that you know what a GUI is, let’s take a look at how to develop one for the Raspberry Pi.
Below, we’ve discussed two easy methods to install, run, and develop GUI in your Raspberry Pi.
Method 1
If during the process of installing Raspbian, you failed to set up the GUI properly and now need to install GUI in your Pi, method 1 might be perfect for you.
Step 1: Log in to your Pi
To begin with, log in using your username and password as you boot into the command line. For those who haven’t changed the defaults, the username and password should be “pi” and “raspberry,” respectively.
Step 2: Establish An Internet Connection
You can skip this step if you already have a stable Ethernet connection. But, if you need to connect to Wi-Fi, type the command sudo iwlist wlan0 scan.
Pressing enter will provide you with a list of Wi-Fi SSIDs in your location. Note your network’s SSID and enter the following command to add it to your device.
Sudo nano /etc/wpa_supplicant/wpa_supplicant.conf
Now, type these code lines at the end:
- network = {
- ssid = “YOUR_SSID”
- psk = “YOUR_PASSWORD”
- }
Save the document by pressing Control+O and exit by pressing down Ctrl+X.
Step 3: Installing the Graphical User Interface
You need to install the rip-chromium-mods and raspberrypi-ui-mods after updating apt. Here’s the command you need to type:
“sudo apt-get update && sudo apt-get -y dist-upgrade && sudo apt-get install raspberrypi-ui-mods rpi-chromium-mods”
Once the process is complete, restart your Raspberry Pi using the sudo reboot command.
Step 4: Configure
If you fail to start GUI on Raspberry Pi even after booting (see also ‘Can Raspberry Pi Boot From USB?‘), you can enable the graphical user interface manually from the configuration file by typing sudo raspi-config
Navigate the “Enable Boot to Desktop” tab and press it. Now choose Login user ‘Pi’ on the desktop.
Follow the on-screen instructions, and you’ll successfully start GUI on Raspberry Pi.
Click Here For The Best Raspberry Pi Gear & Accessories!
Method 2
To develop GUI for Raspberry Pi using the second method, as a prerequisite, you’ll need to install both Python 3 and the Guizero Python module on your device.
Once installed, here’s an example of how to make a simple GUI for Raspberry Pi in Python from scratch:
Step 1: Create A Script
- Open Python 3 and click on File
- Open New File and save it as gui_test.py
- Now, you’d need to add a code line to the top of your file – it will help import the App class from guizero.
from guizero import App
- Add three more commands to create and display the App on your screen
app = App (title= “GUI Test”)
message= Text (app, text= “hello world”)
app. display ()
- Save the file and run it by typing
Sudo python3 gui_test.py
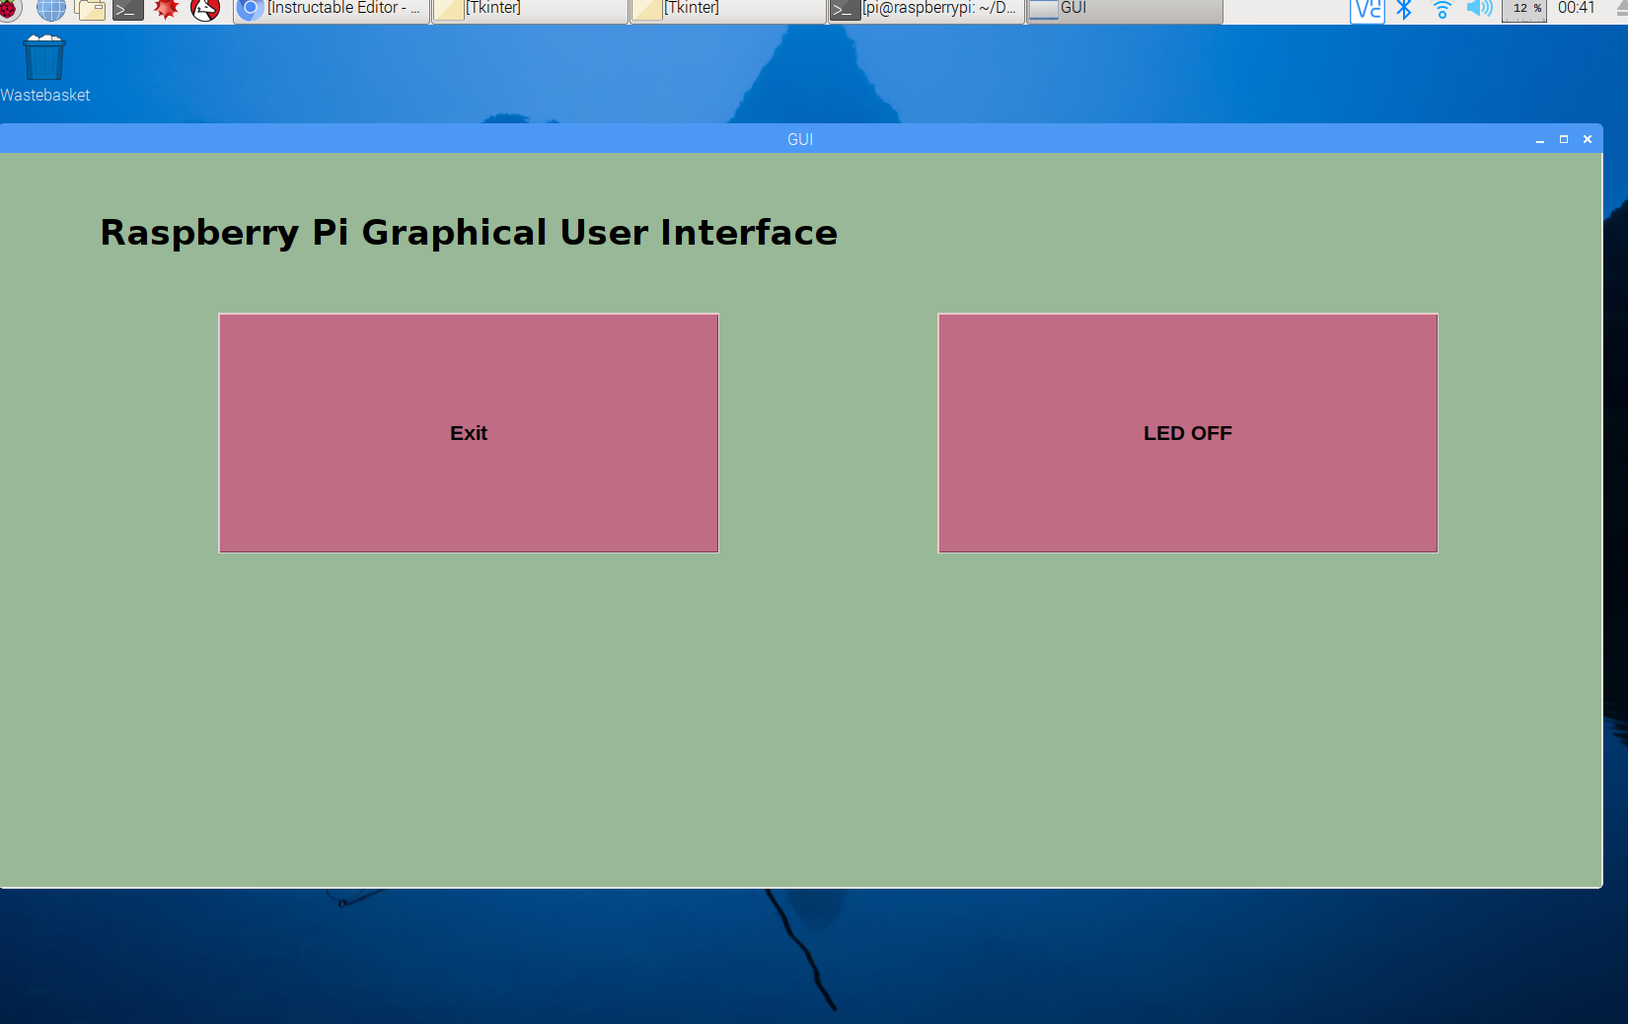
- There you have it! You have successfully developed a simple GUI that can display text messages in Raspberry Pi
Step 2: Add Widgets
Now that you know how to make a GUI for Raspberry Pi, you can start adding content and widgets to your graphical user interface using Guizero. These can include anything like text boxes, text, pictures, and buttons.
Here’s what you can do to start adding widgets to your GUI:
- First, you must always import any new widget you’re willing to use from the Guizero library. The first code line on your screen will be from guizero import App
- So, if you want to use a text widget, you can import it using the code of line: from guizero import App, Text
- Or, if you need something else, like a push button widget, you can import it using the code: from guizero import App, Pushbutton
- For the complete library of Guizero widgets and how to add each one individually, click here.
Just remember, the key is to always add an import statement and make sure to always add the code above the app.display() or event loop and below the code line when adding widgets.
You have to do this because the code line starts in the event loop. Once you implement it, the graphical user interface waits for user actions or events, like pressing a button.
The GUI will then track your actions and update the display accordingly. However, once the event loop is blocked, the code you write after it won’t execute!

The Takeaway: How To Develop GUI for Raspberry Pi
Developing and setting up a GUI for the Raspberry Pi is a relatively complex process, especially for beginners with little to no coding experience. However, the two methods outlined above should hopefully get you started on the right track.
It’s important to note that while many tools and programming languages can be used to develop GUI for Raspberry Pi, the key thing is to choose the right tool for the job and to have fun throughout the process!
Finally – if you’re more of a visual learner – the video below is a great walkthrough that will help you build out an easy GUI! Check it out: